Today, we’ll be covering how to whitelist IP addresses in DigitalOcean. A simple but effective step towards securing your DigitalOcean cloud environment.
When it comes to cybersecurity, defense in depth is key. Imagine you want to secure your home, you may put up a fence around your property, locks on the doors, install an alarm system, have a dog, and as a last resort, maybe a home defense weapon. This would offer multiple layers of defense between your family and whoever may be attempting to gain access.
In this simple example, you can think of allowlisting IP addresses as putting up a fence around your server that you would like to protect. It’s a single layer but an effective layer in your defense in depth model. So with that said, let’s jump right into today’s tutorial where we will be covering how to set up a DigitalOcean firewall, create and edit firewall rules, and add or remove DigitalOcean resources from a firewall.
Prerequisites
- A Digital Ocean account: https://www.digitalocean.com/
Overview
- Create a firewall
- Add, Edit, and Remove firewall rules
- Attach firewall to the desired resource(s)
- Whitelisting IPs for different scenarios
- Wrap up
Create a firewall
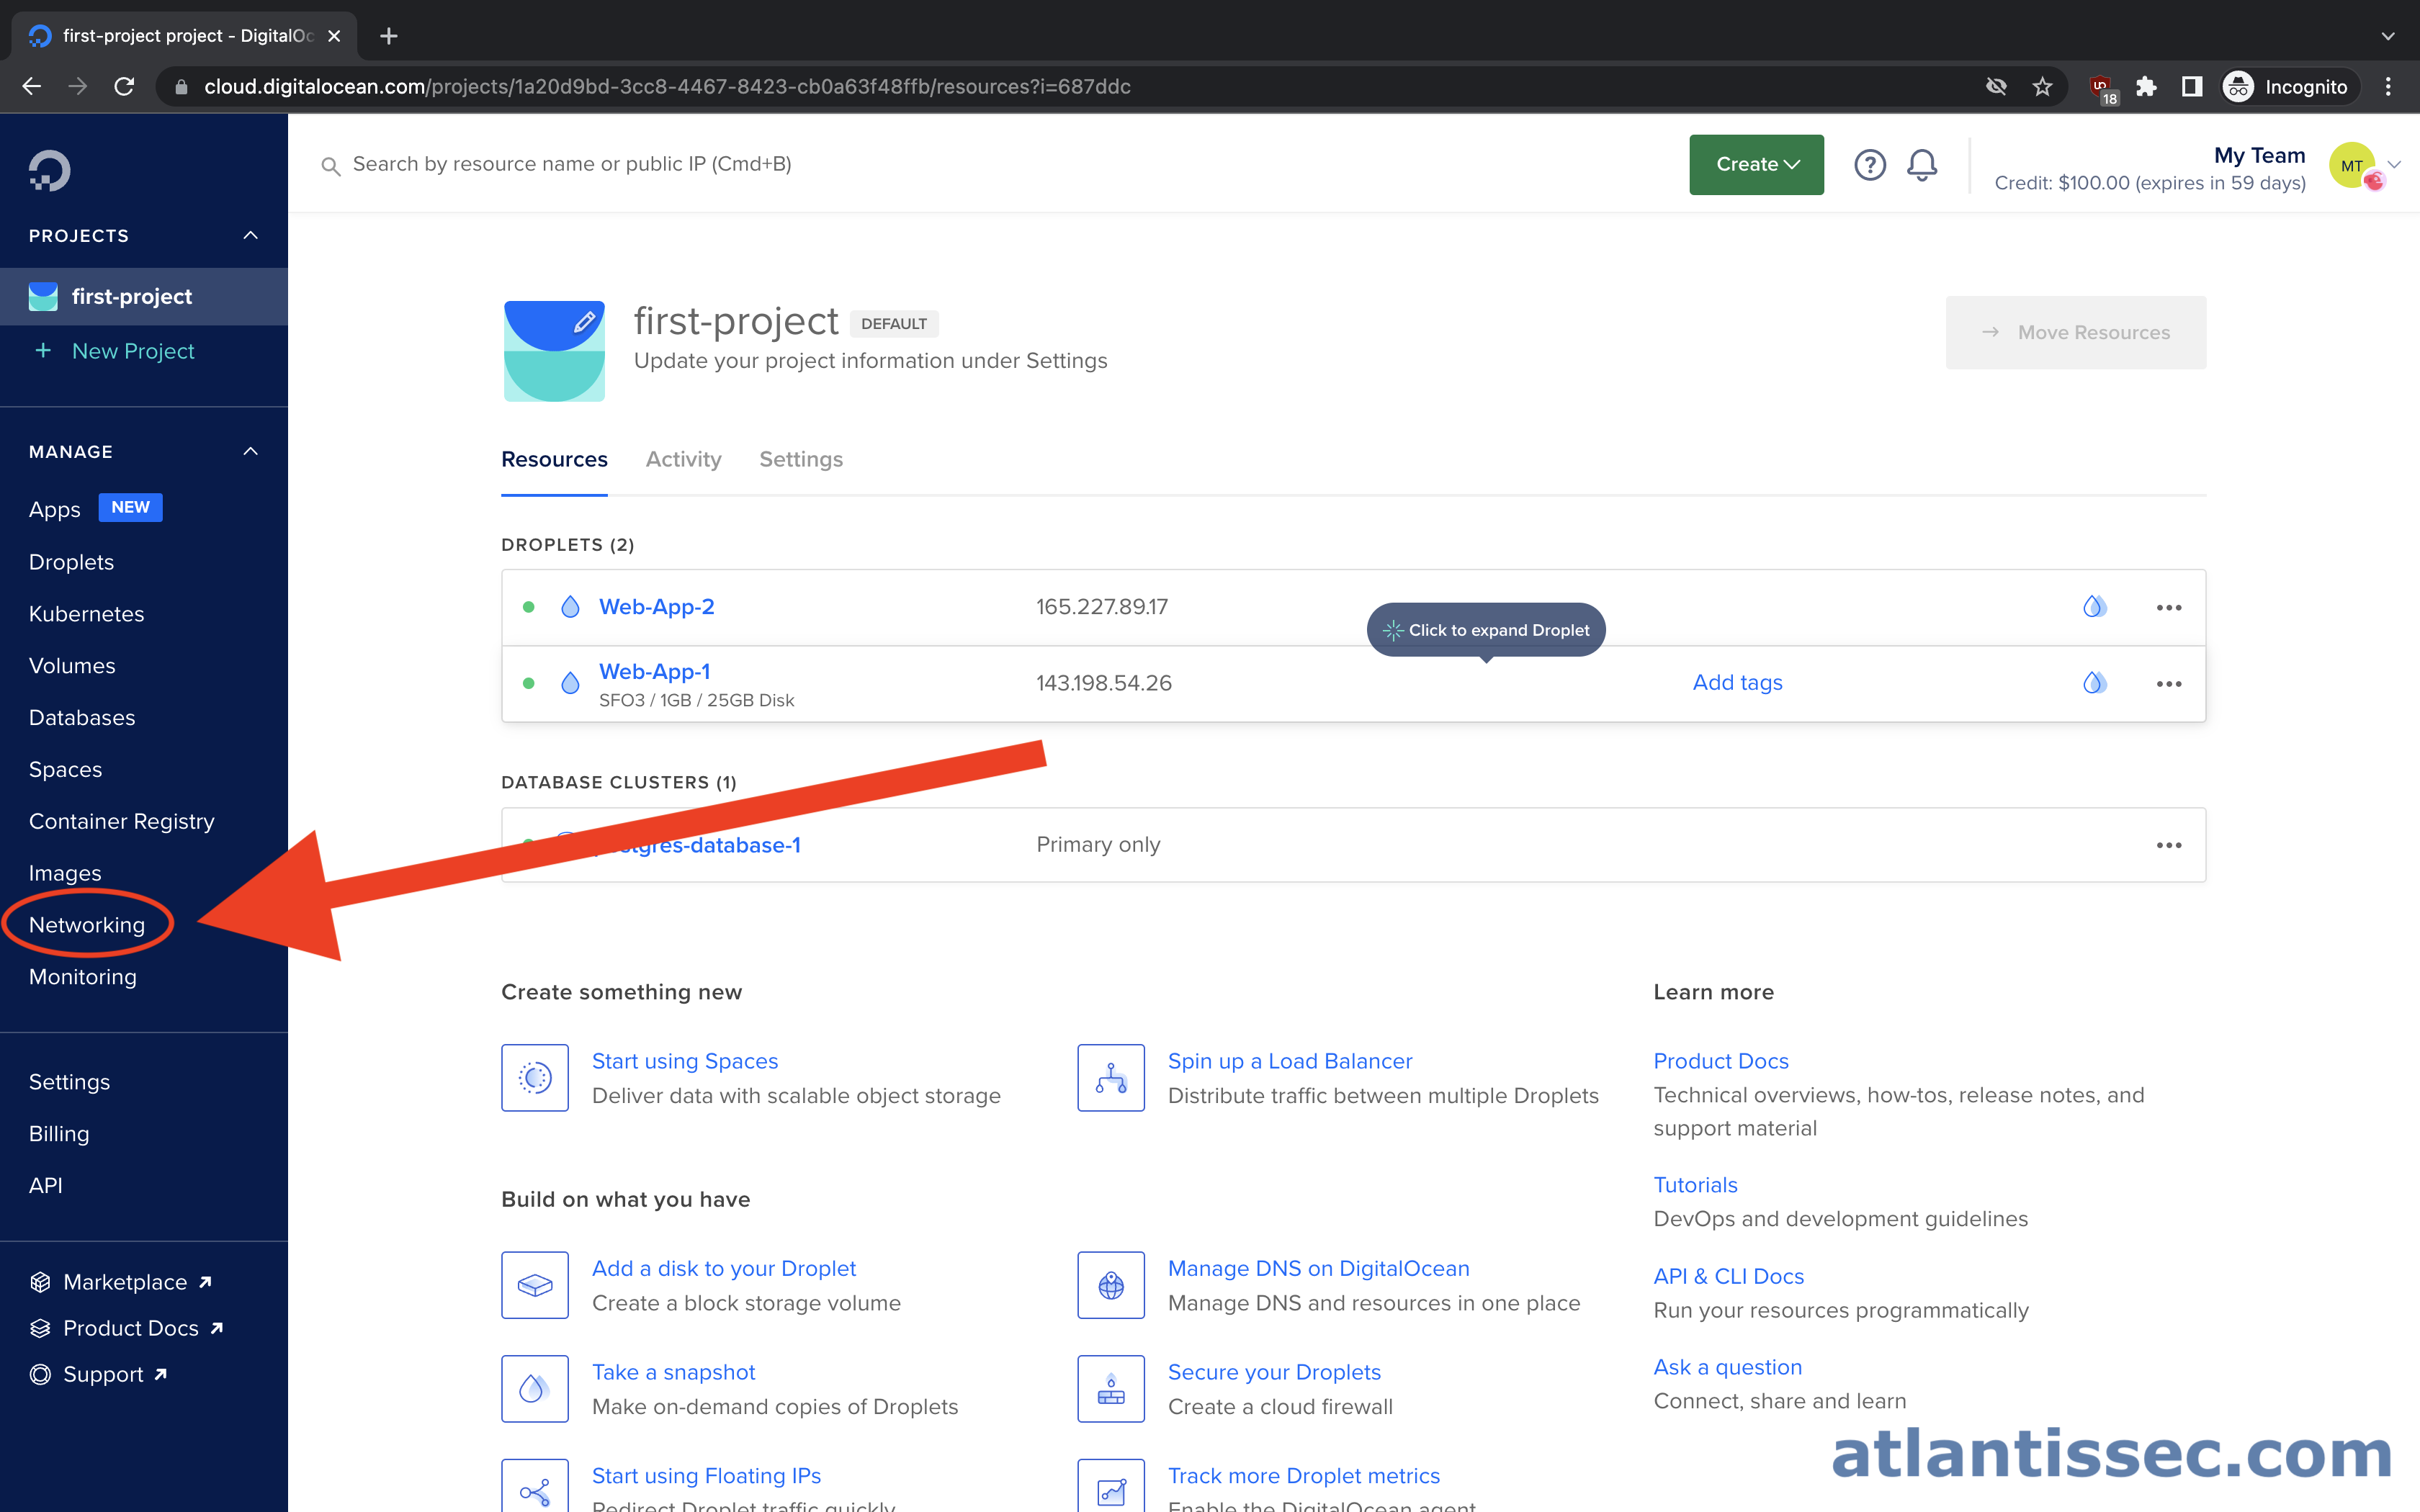
Navigate to the “Networking” section of your control panel
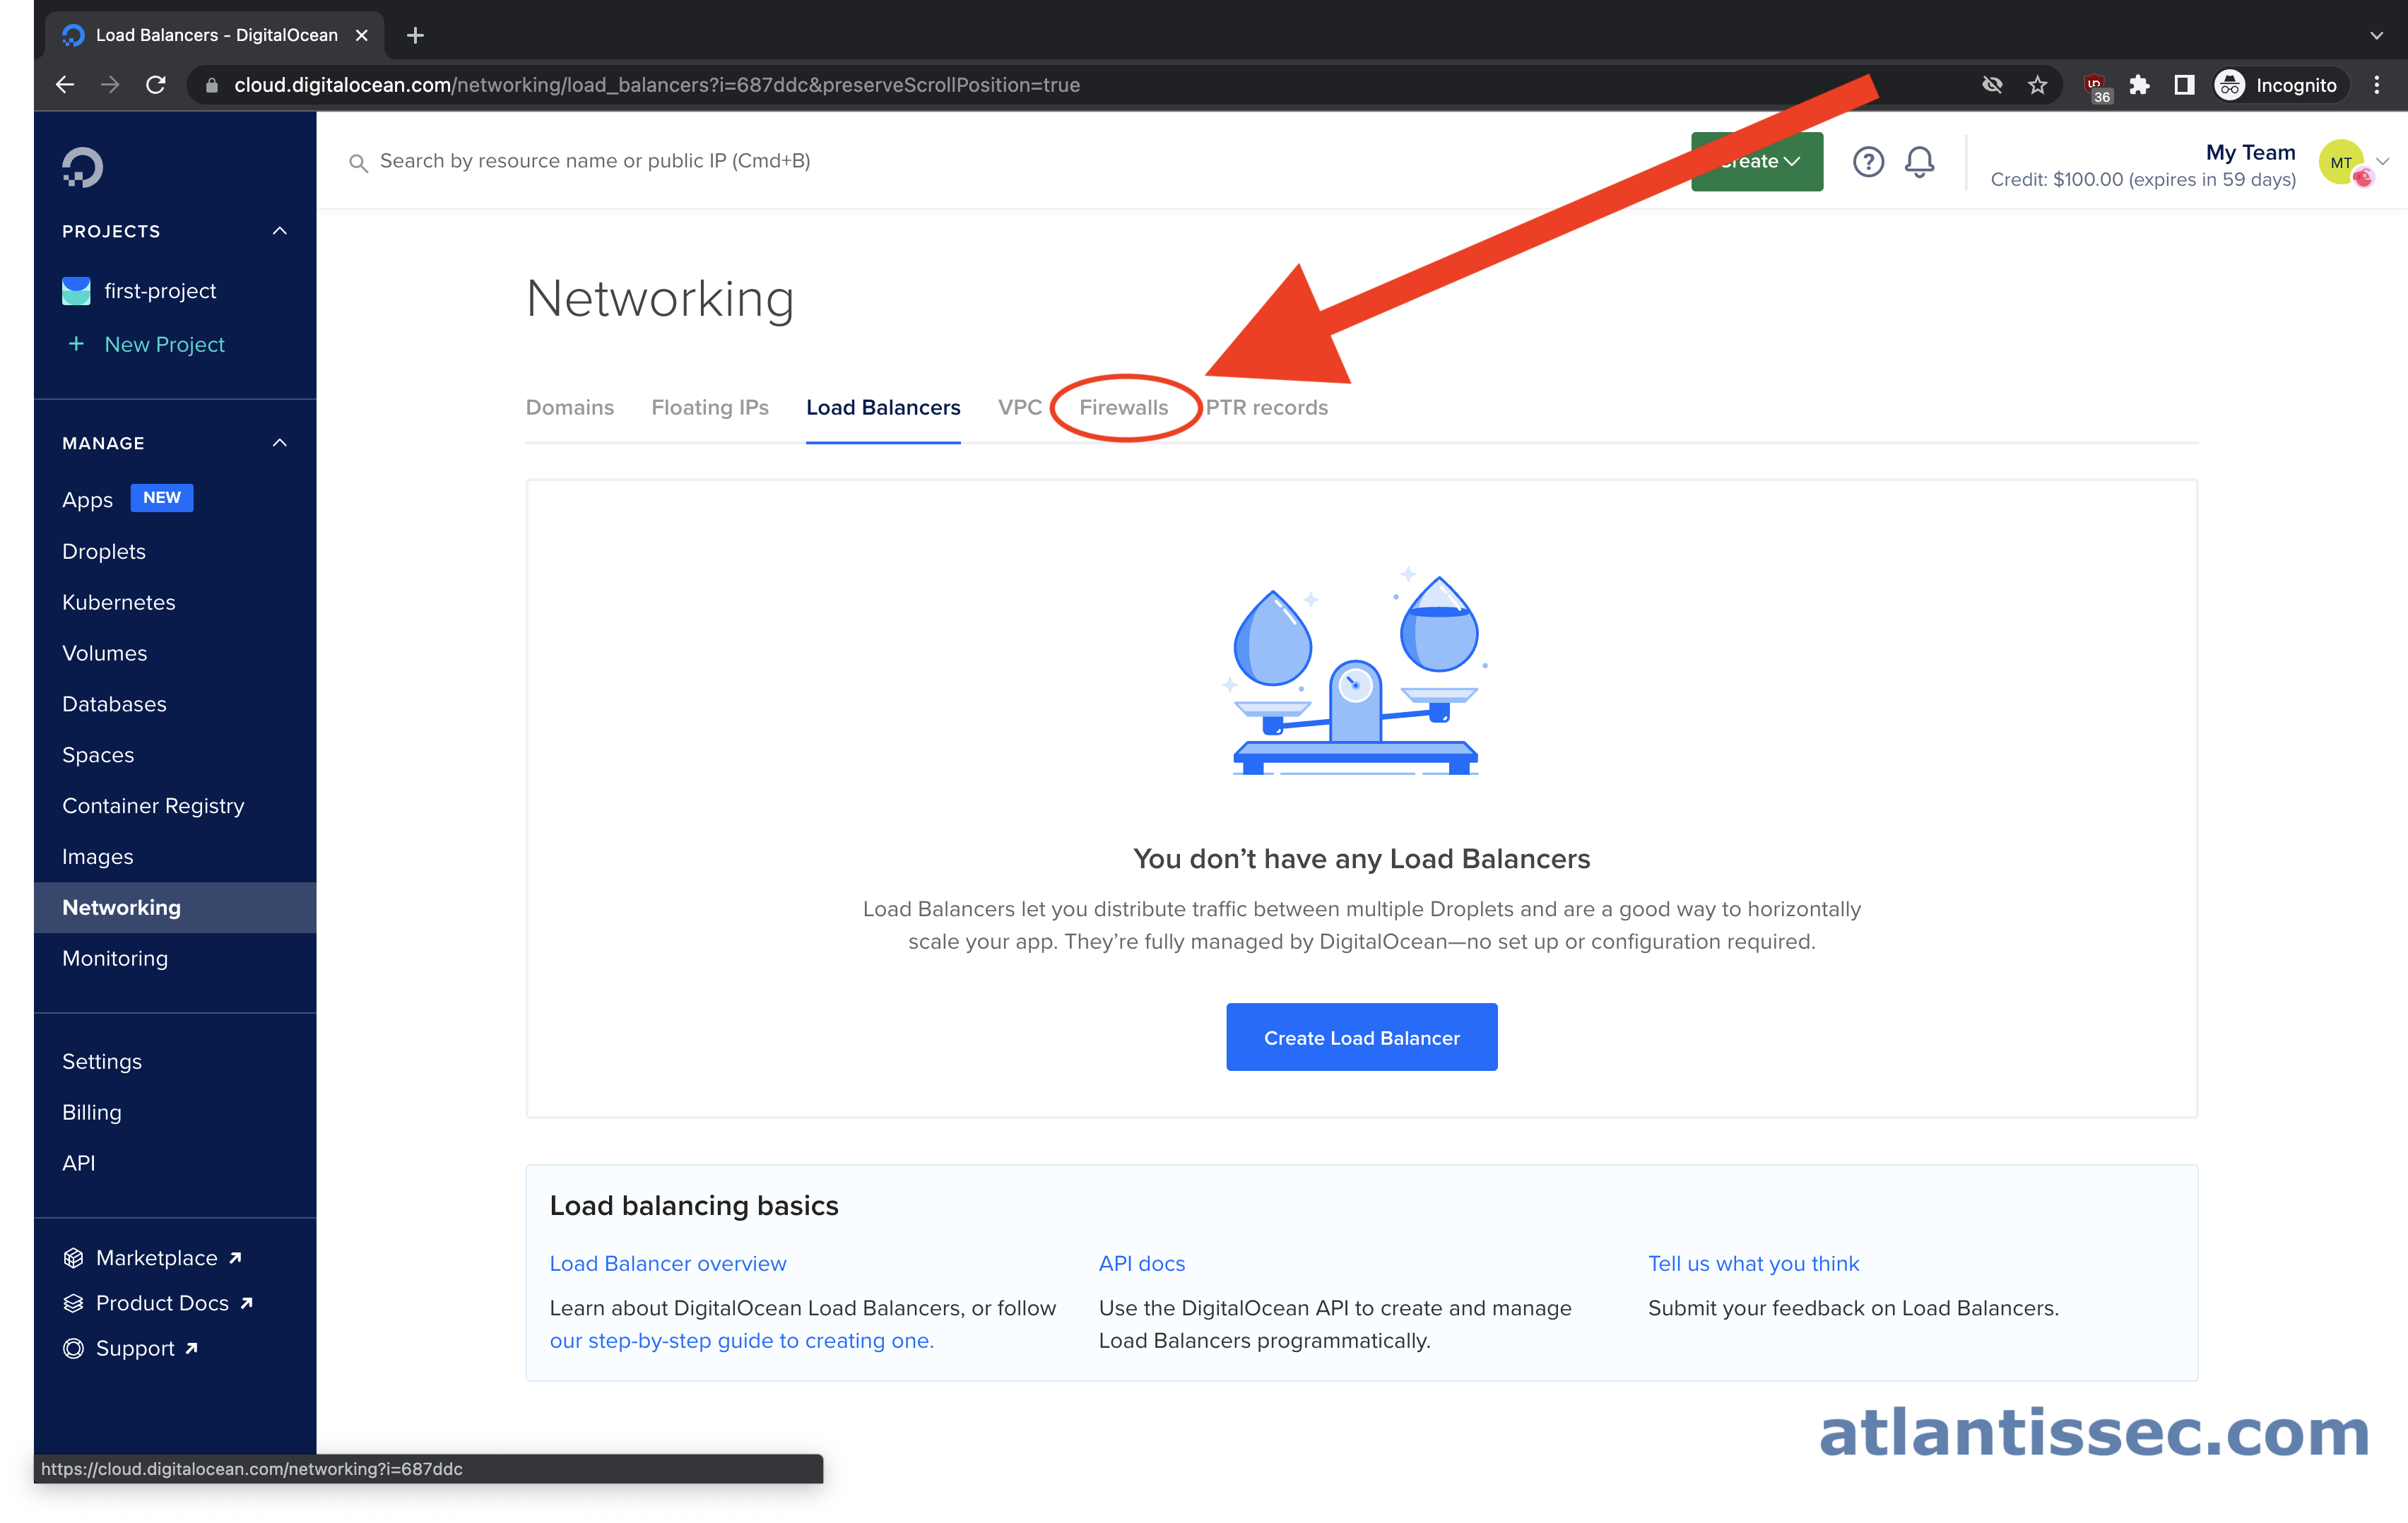
Click on the “Firewalls” tab under the networking section
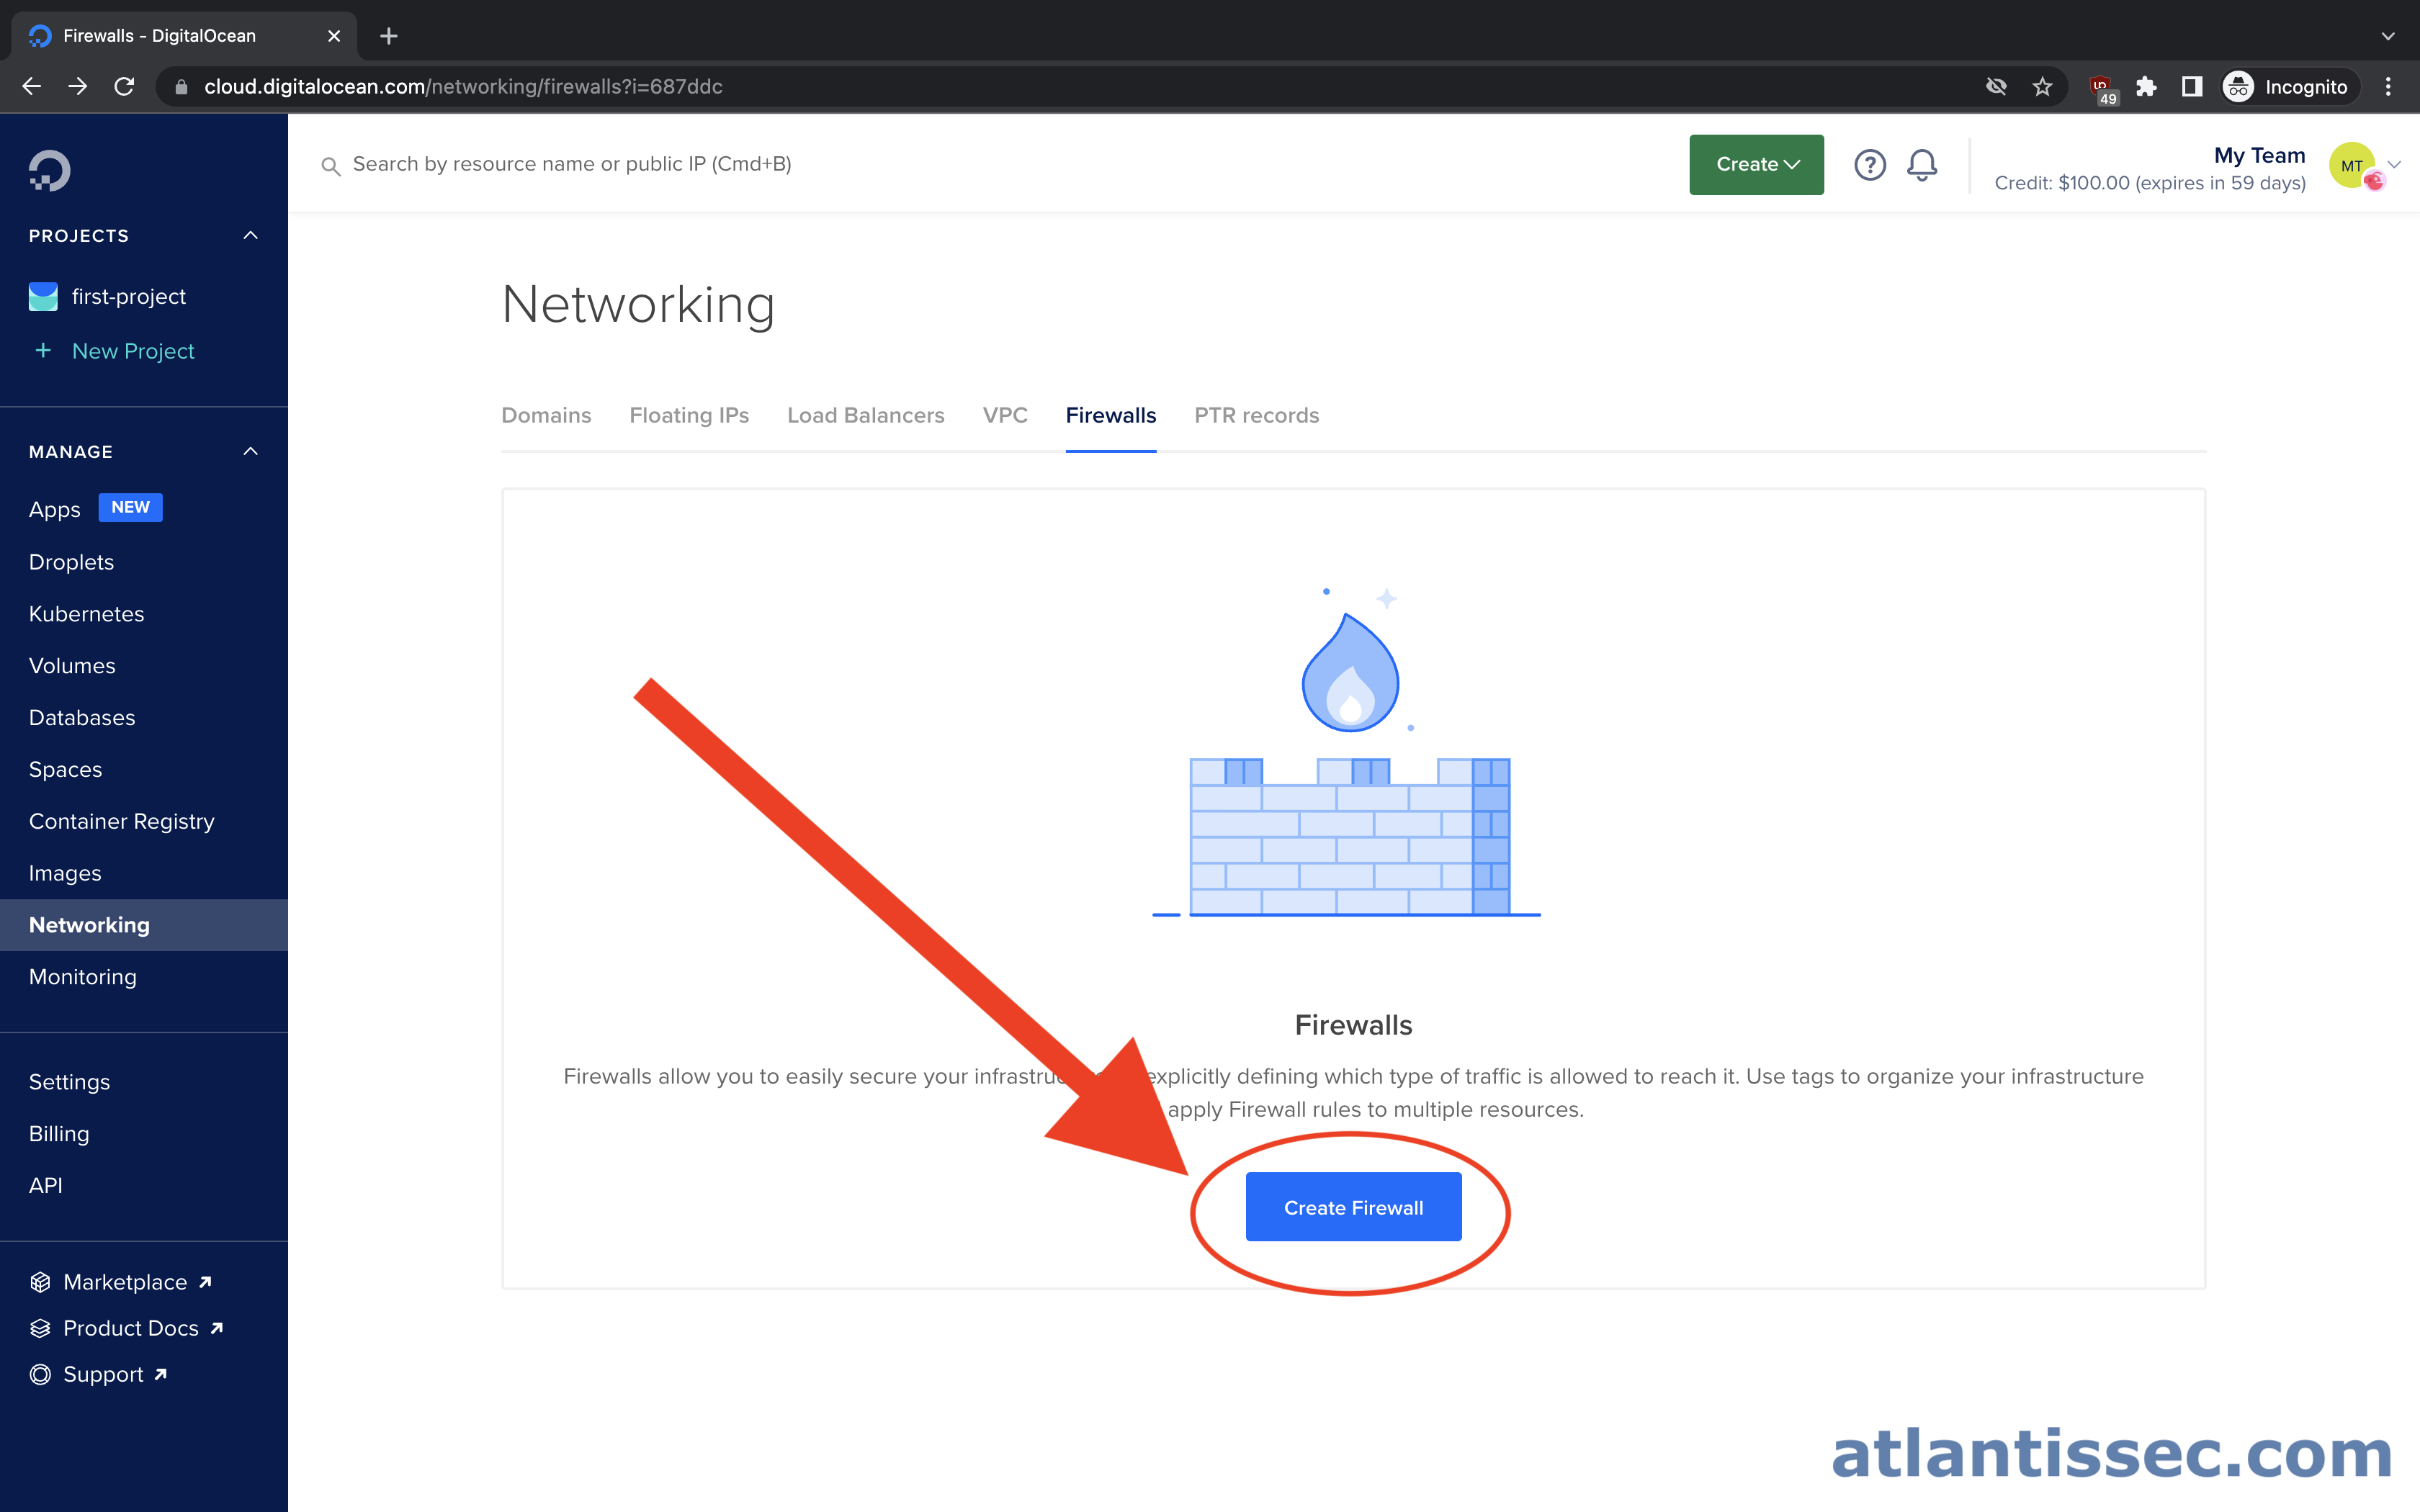
Click the “Create Firewall” button
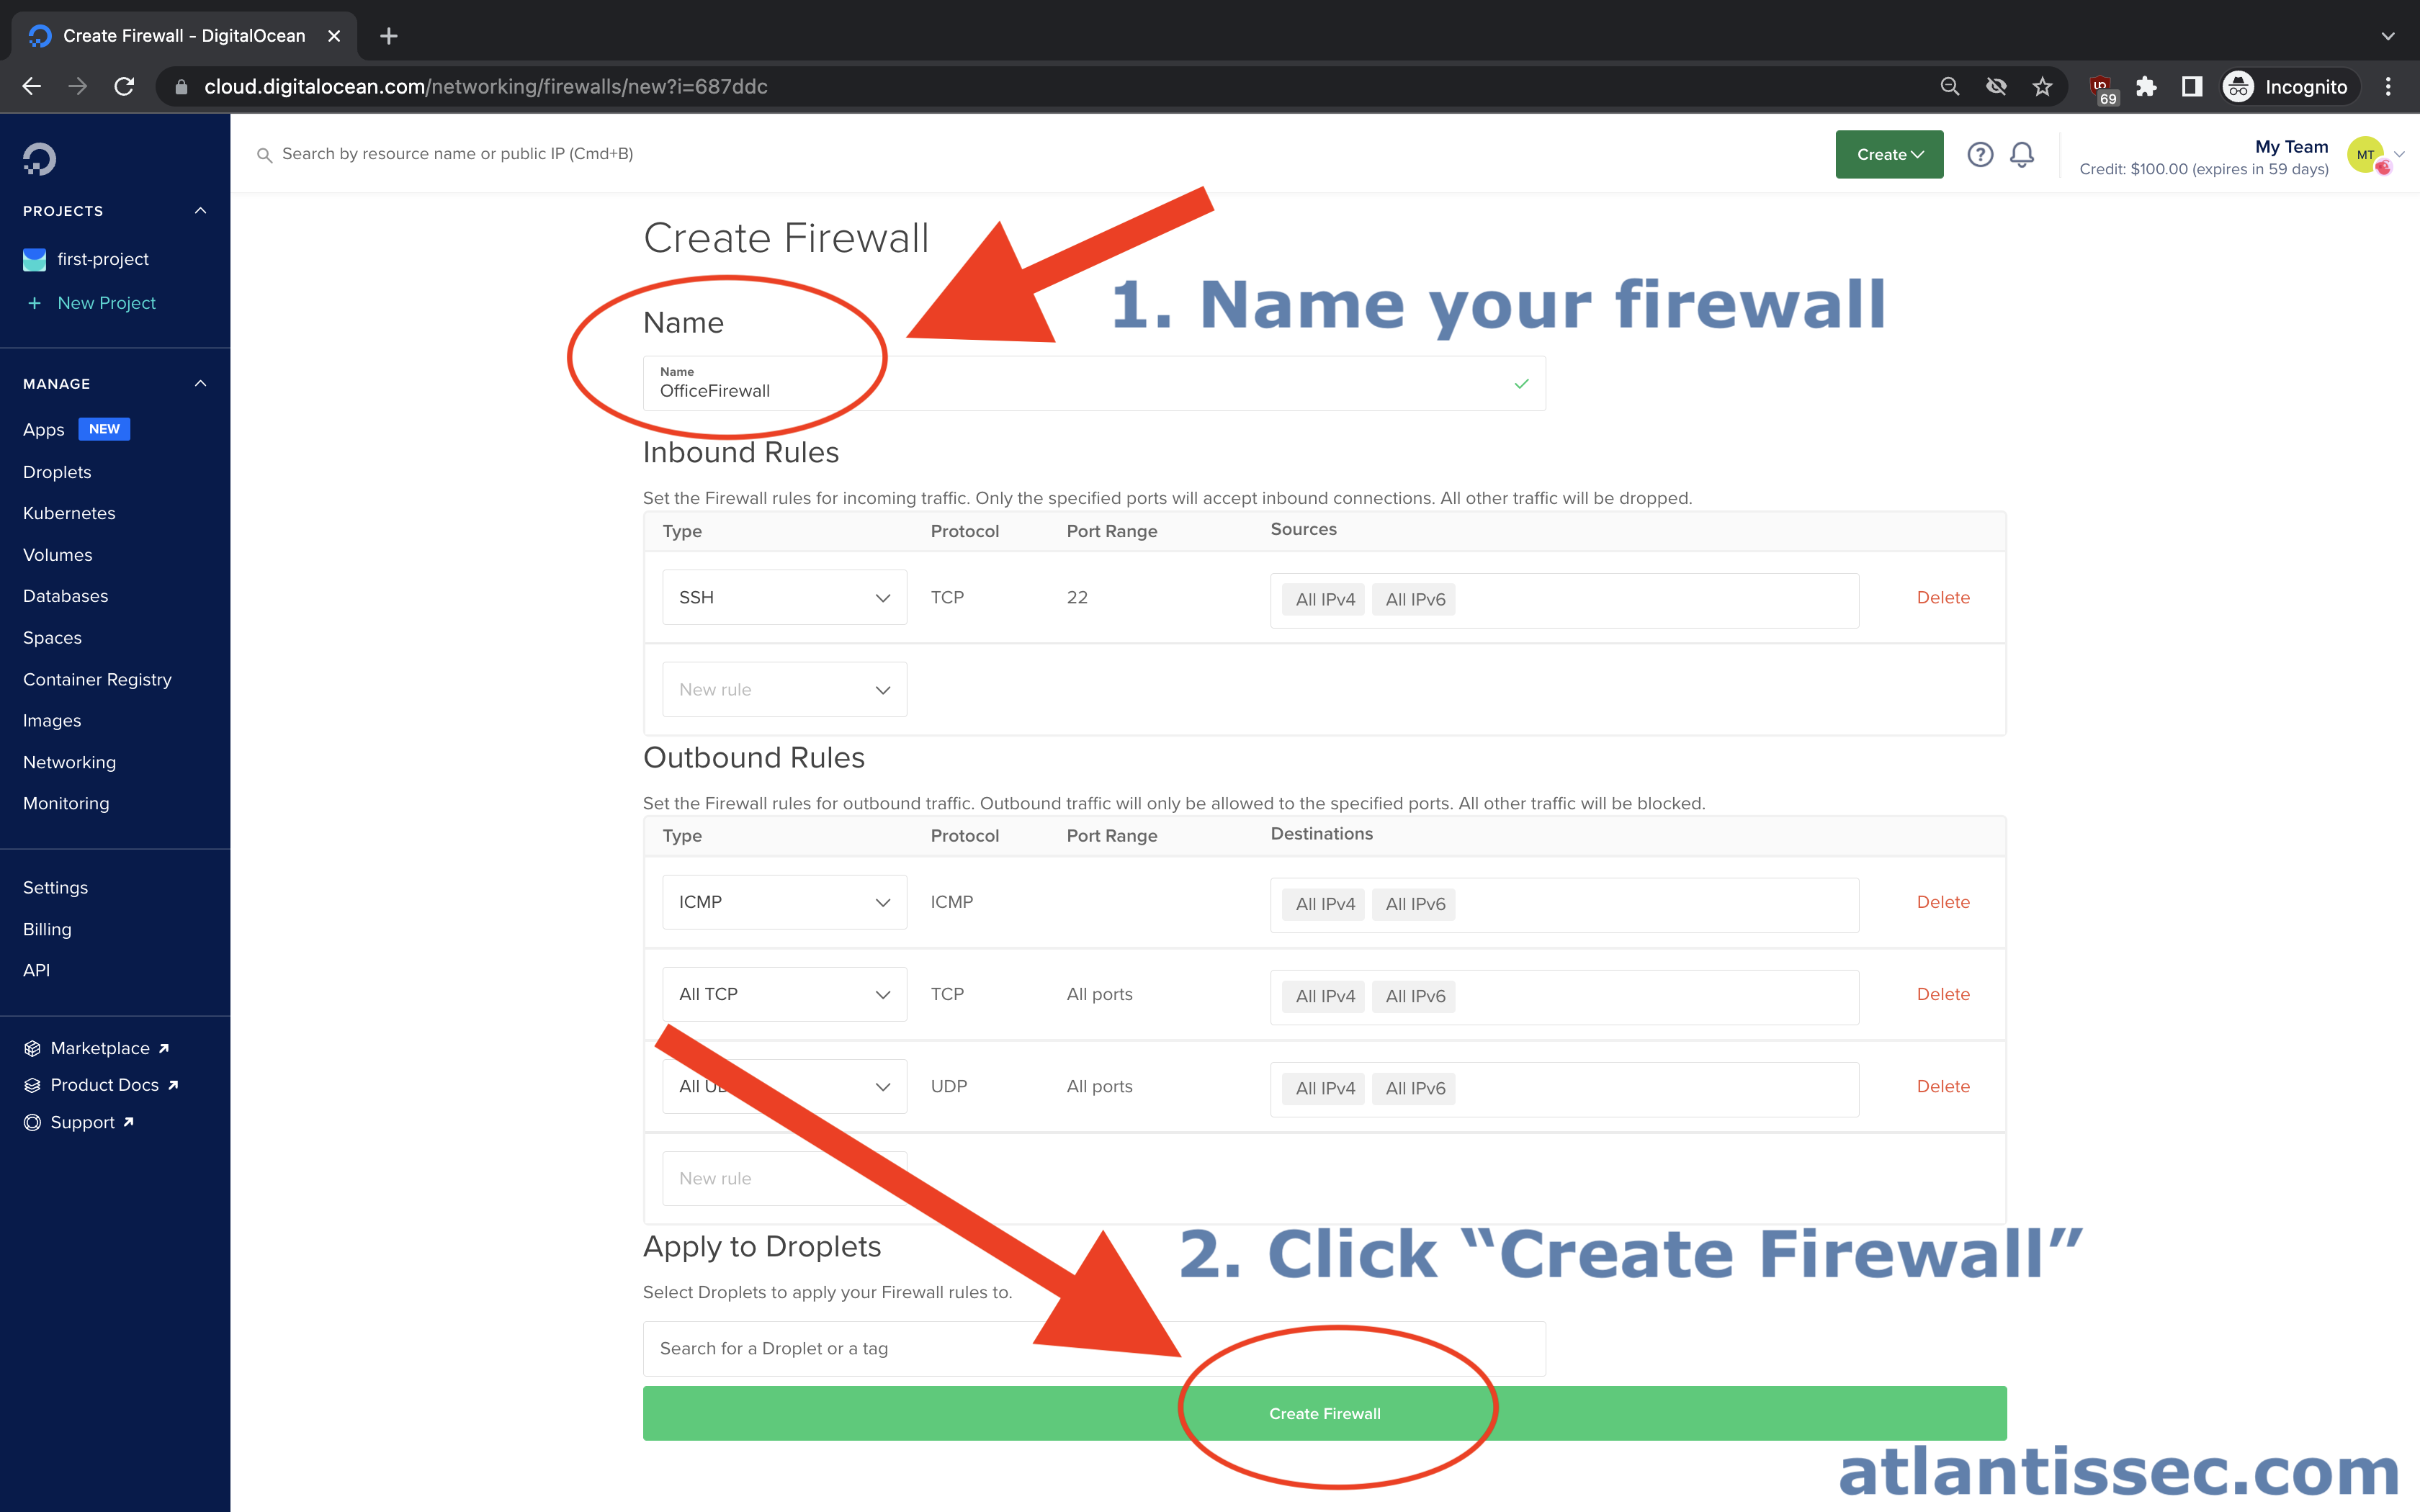
You should now see the below firewall setup page. Let’s go ahead and give our firewall a “Name” and then click the “Create Firewall” button at the bottom of the page. We’ll create this firewall with the default ruleset and go over how to create and edit rules for various scenarios in the next section
Add, Edit, and Remove firewall rules
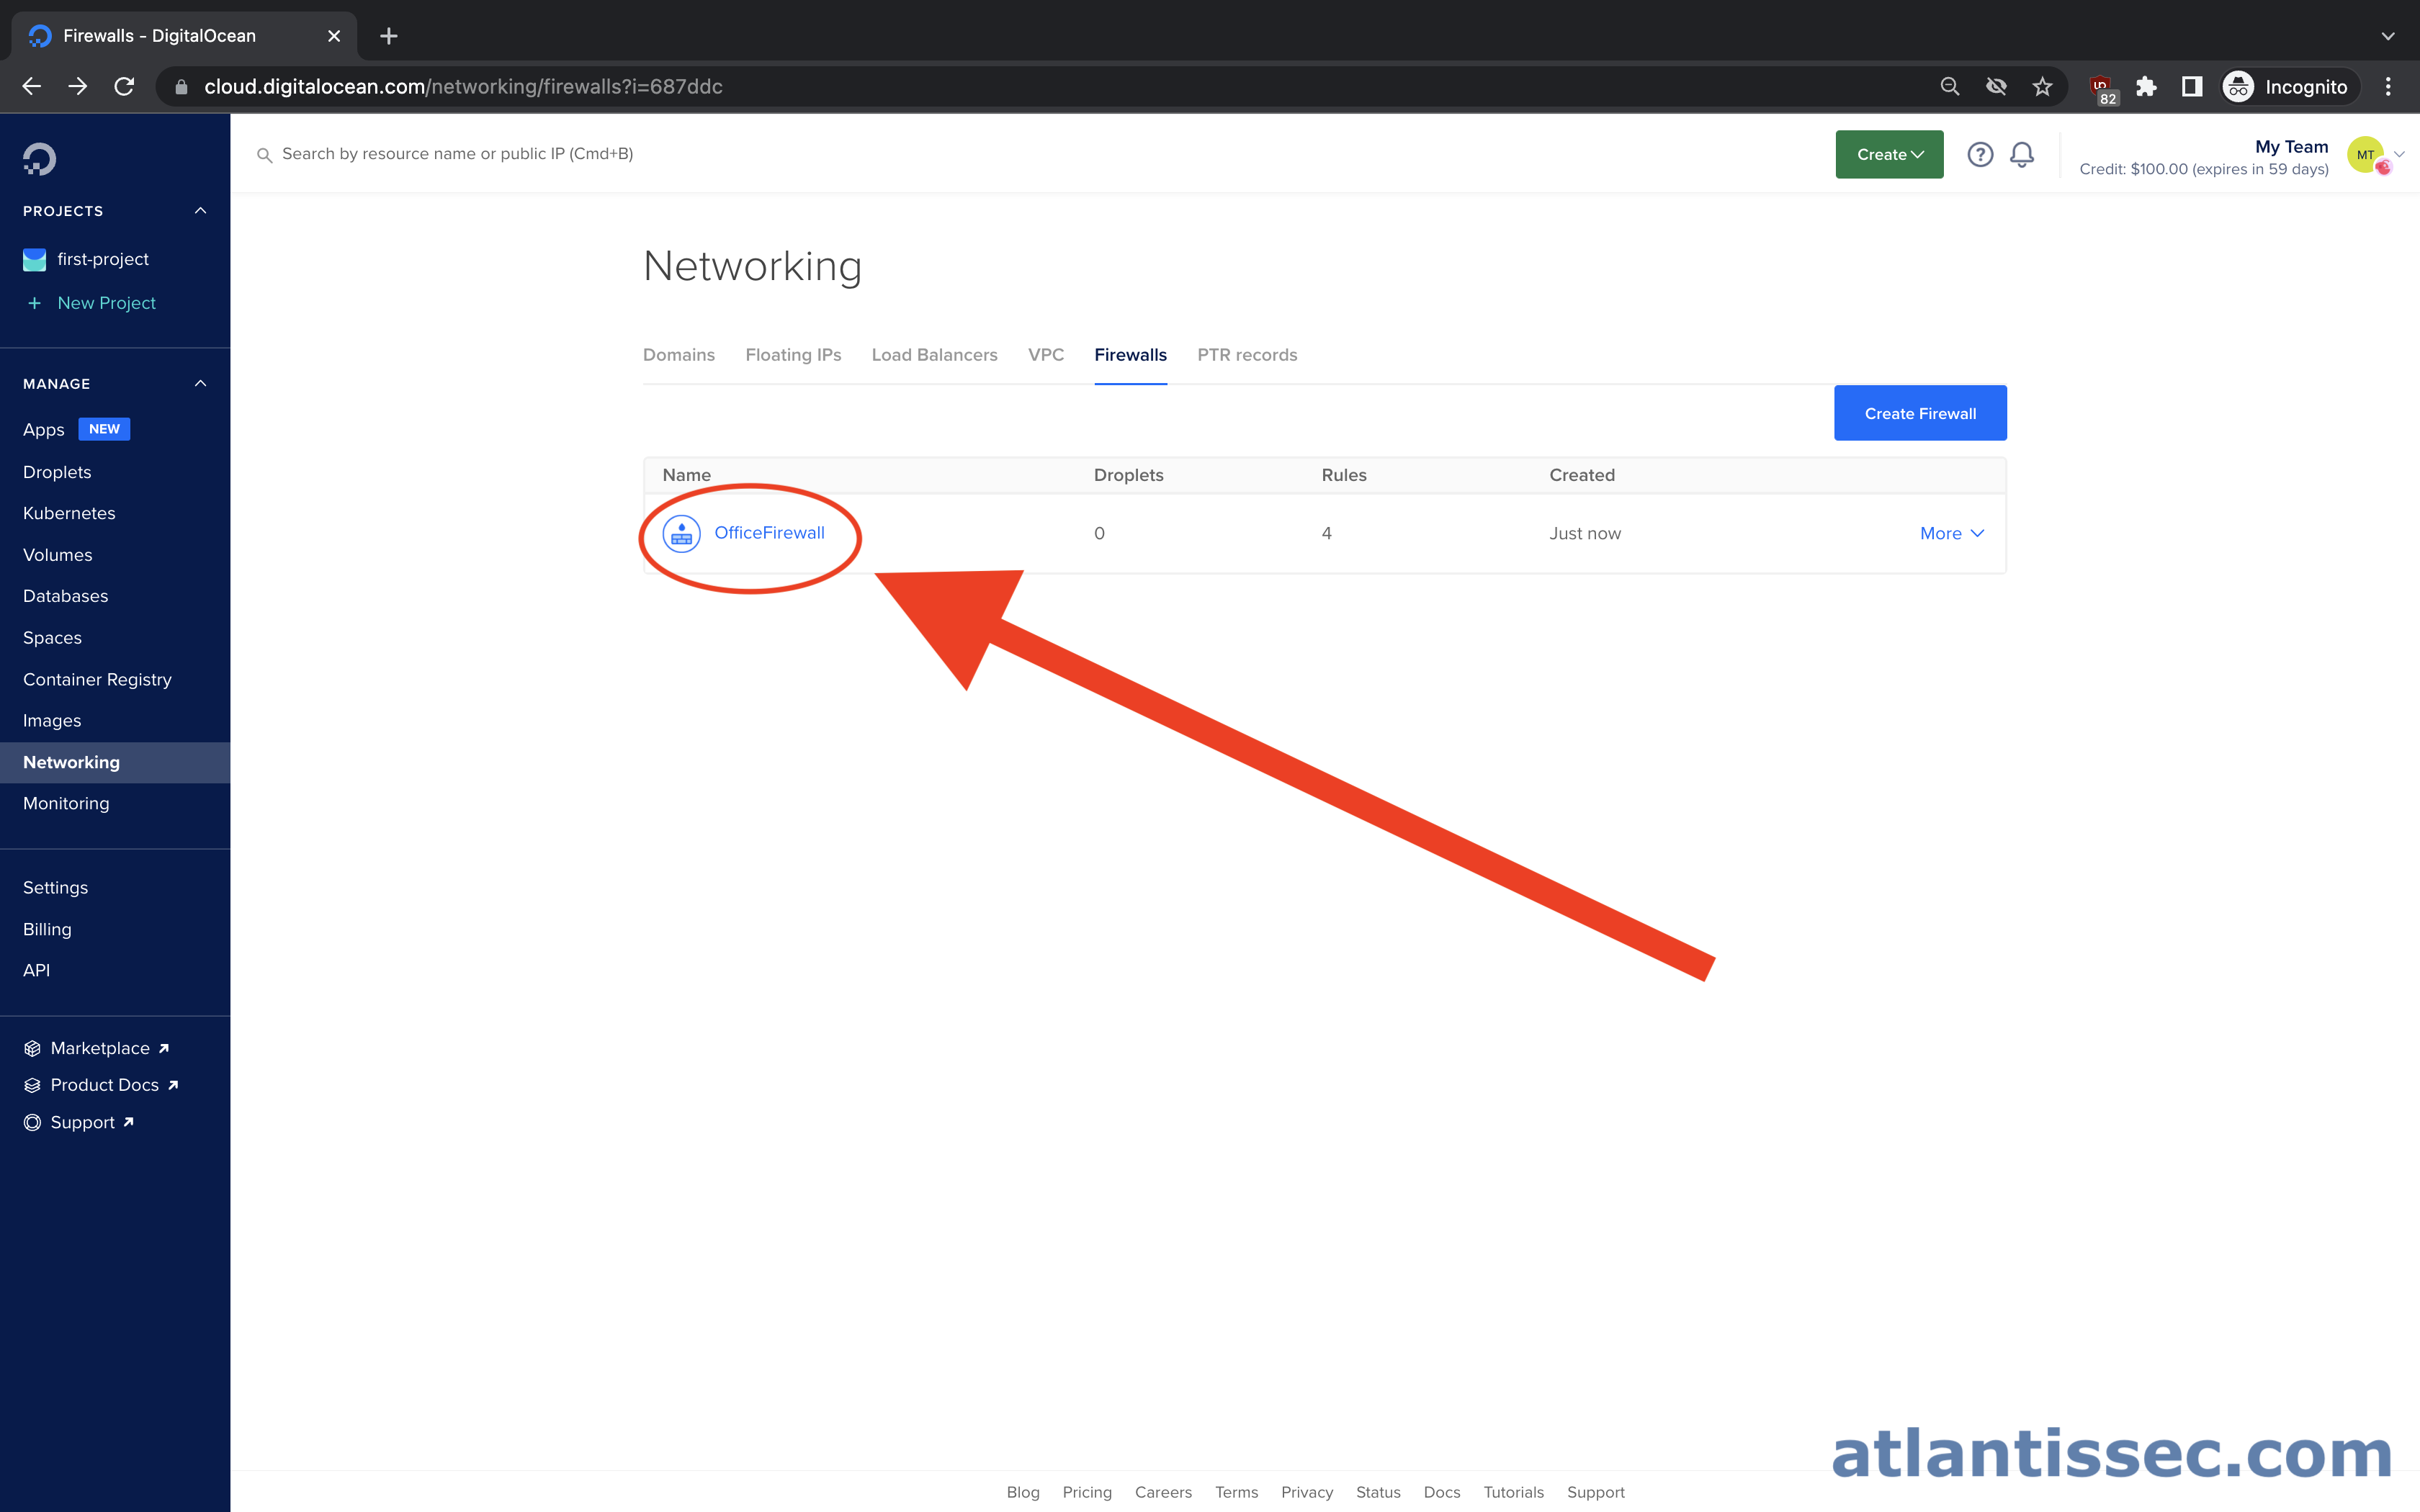
In this section, we will go over the general process for adding, editing, and removing rules and later on, we’ll go over some specific scenarios of when you might want to whitelist an IP address. So now that we have our first firewall created, let’s navigate to it so we can start creating and editing firewall rules. At this point, you should see the name of the firewall you created on the screen. Go ahead and click on the name to open it up or follow these steps to navigate back to the list of your firewalls.
By default, when you create a brand new DigitalOcean firewall without making any changes during setup, your firewall will already be configured to allow all OUTBOUND traffic to all destinations and allow INBOUND connections to port 22 (SSH) from all sources. It will also have no resources attached to it so it will not have any effect until you add a resource to the firewall. It is also worth noting that all traffic will be denied unless it is explicitly allowed by a firewall rule.
A firewall rule in DigitalOcean consists of these 4 parameters:
- Type: You can select a predefined type such as “HTTPS” which will set the protocol and port range for you. If you need a custom protocol and port, select “Custom”.
- Protocol: This can be UDP or TCP unless you select a type of “ICMP”.
- Port Range: Here you can specify a single port, a range of ports, or all ports by leaving this field blank.
- Source: This is where you will put the IP(s) or resource name that you want to allow. This can be in the format of a single IP, a CIDR (e.g.
10.0.0.0/8), or a DigitalOcean resource such as a Droplet, Load Balancer, VPC, Kubernetes Cluster, or tag.
Adding a new rule
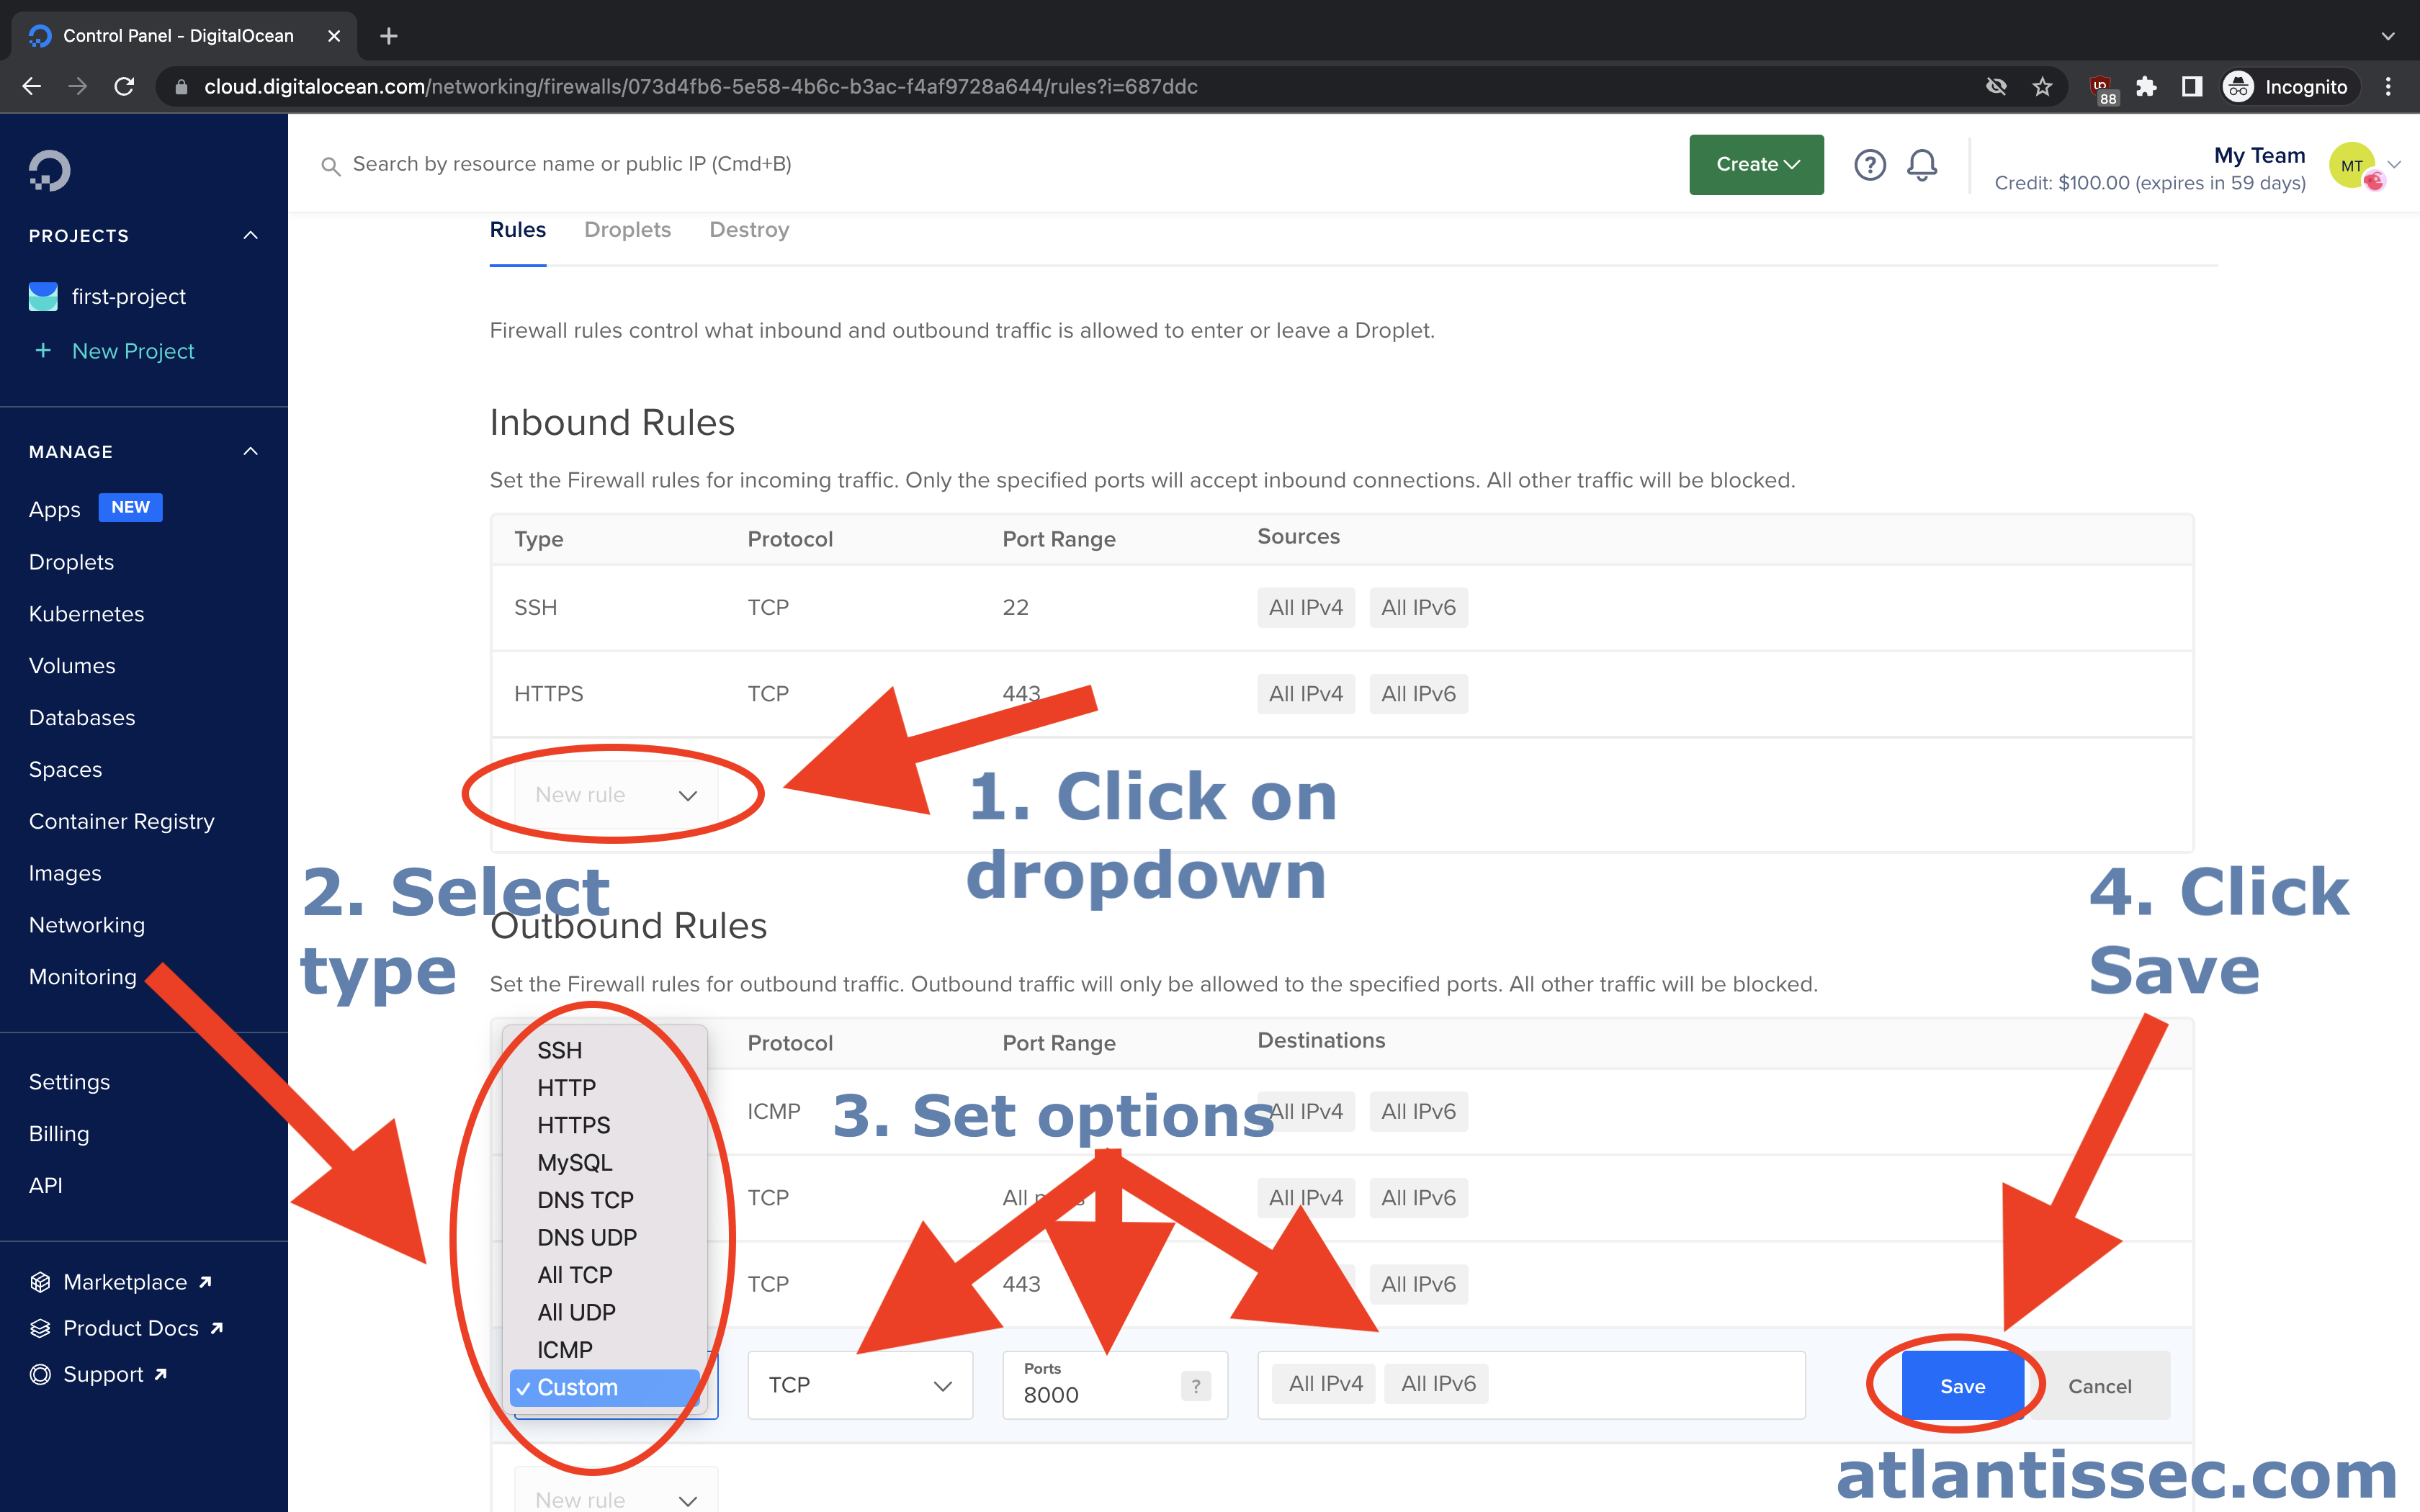
In either the Inbound or Outbound section of your firewall rules, you should see a dropdown box with the text “New rule” under the last rule in the list. Click the dropdown and select an option to start a new rule, enter your desired IPs in the “Sources” and then click the “Save” button.
Edit or Delete an existing rule

Now that you know how to create a rule and add your desired IP, let’s move forward with how you can apply this firewall to your DigitalOcean resources
Attach firewall to the desired resource(s)
The final step to whitelisting IP addresses after you have created your firewall and desired firewall rule is to apply your firewall to the DigitalOcean resources that you want to be protected.
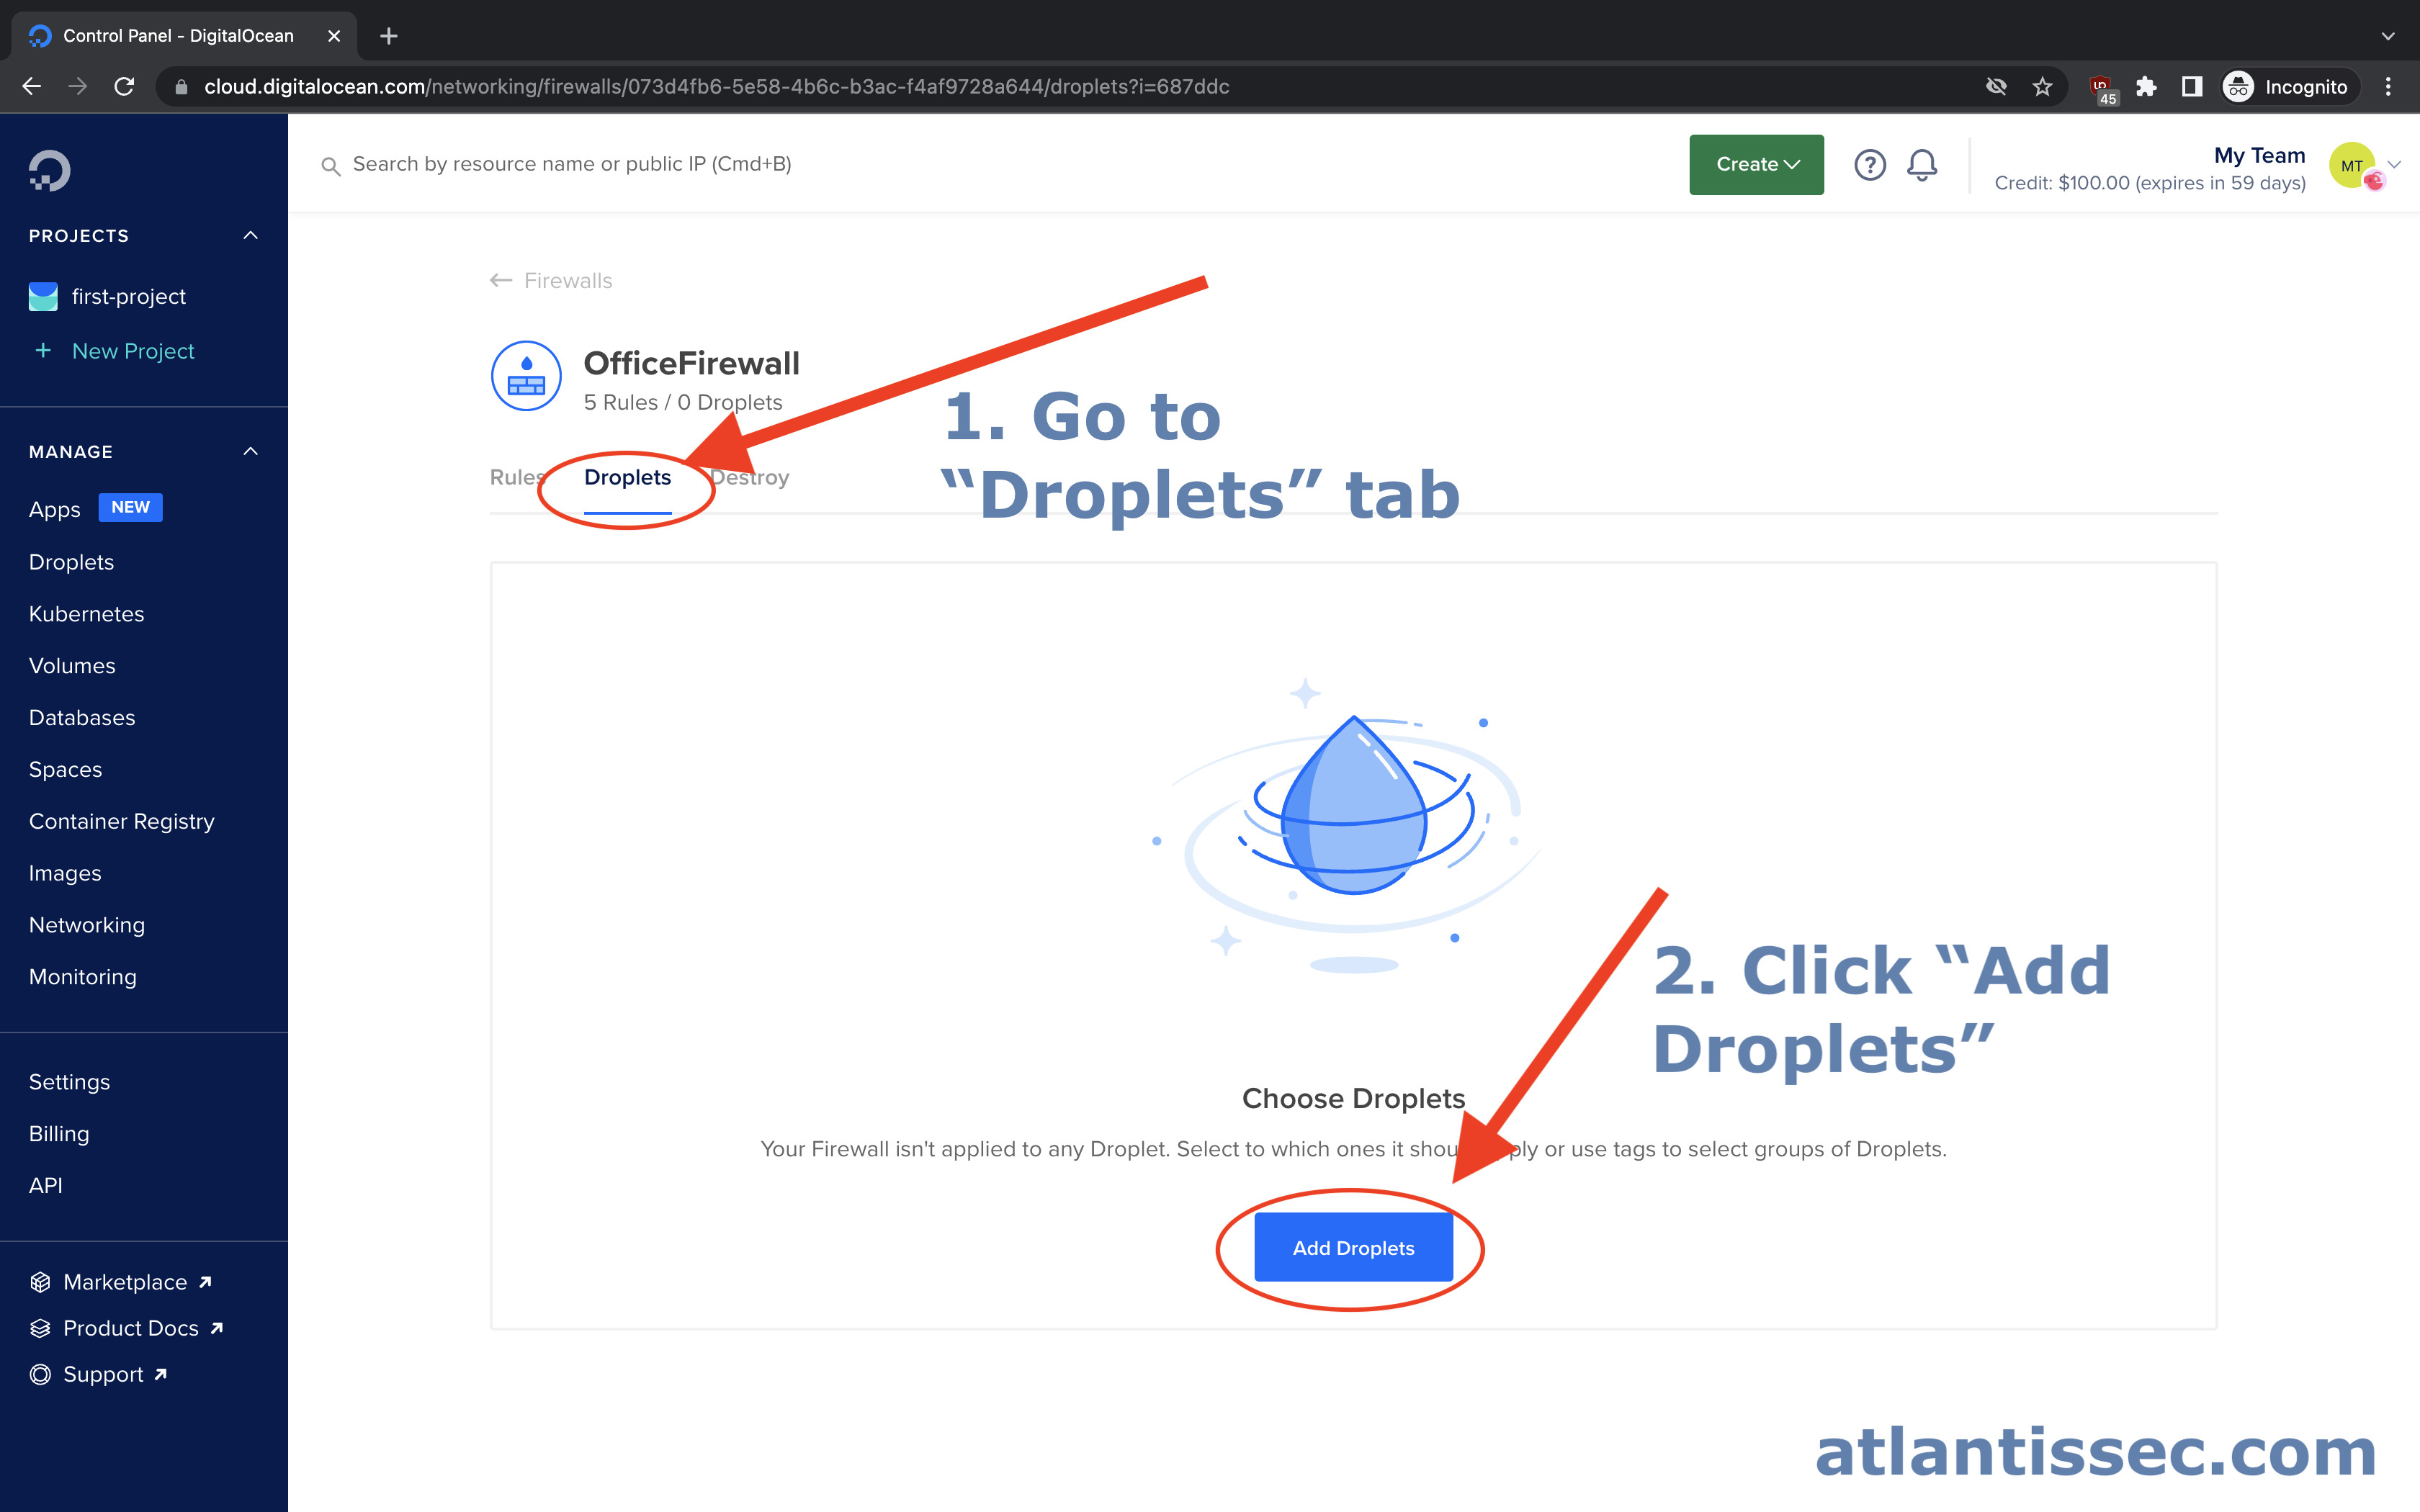
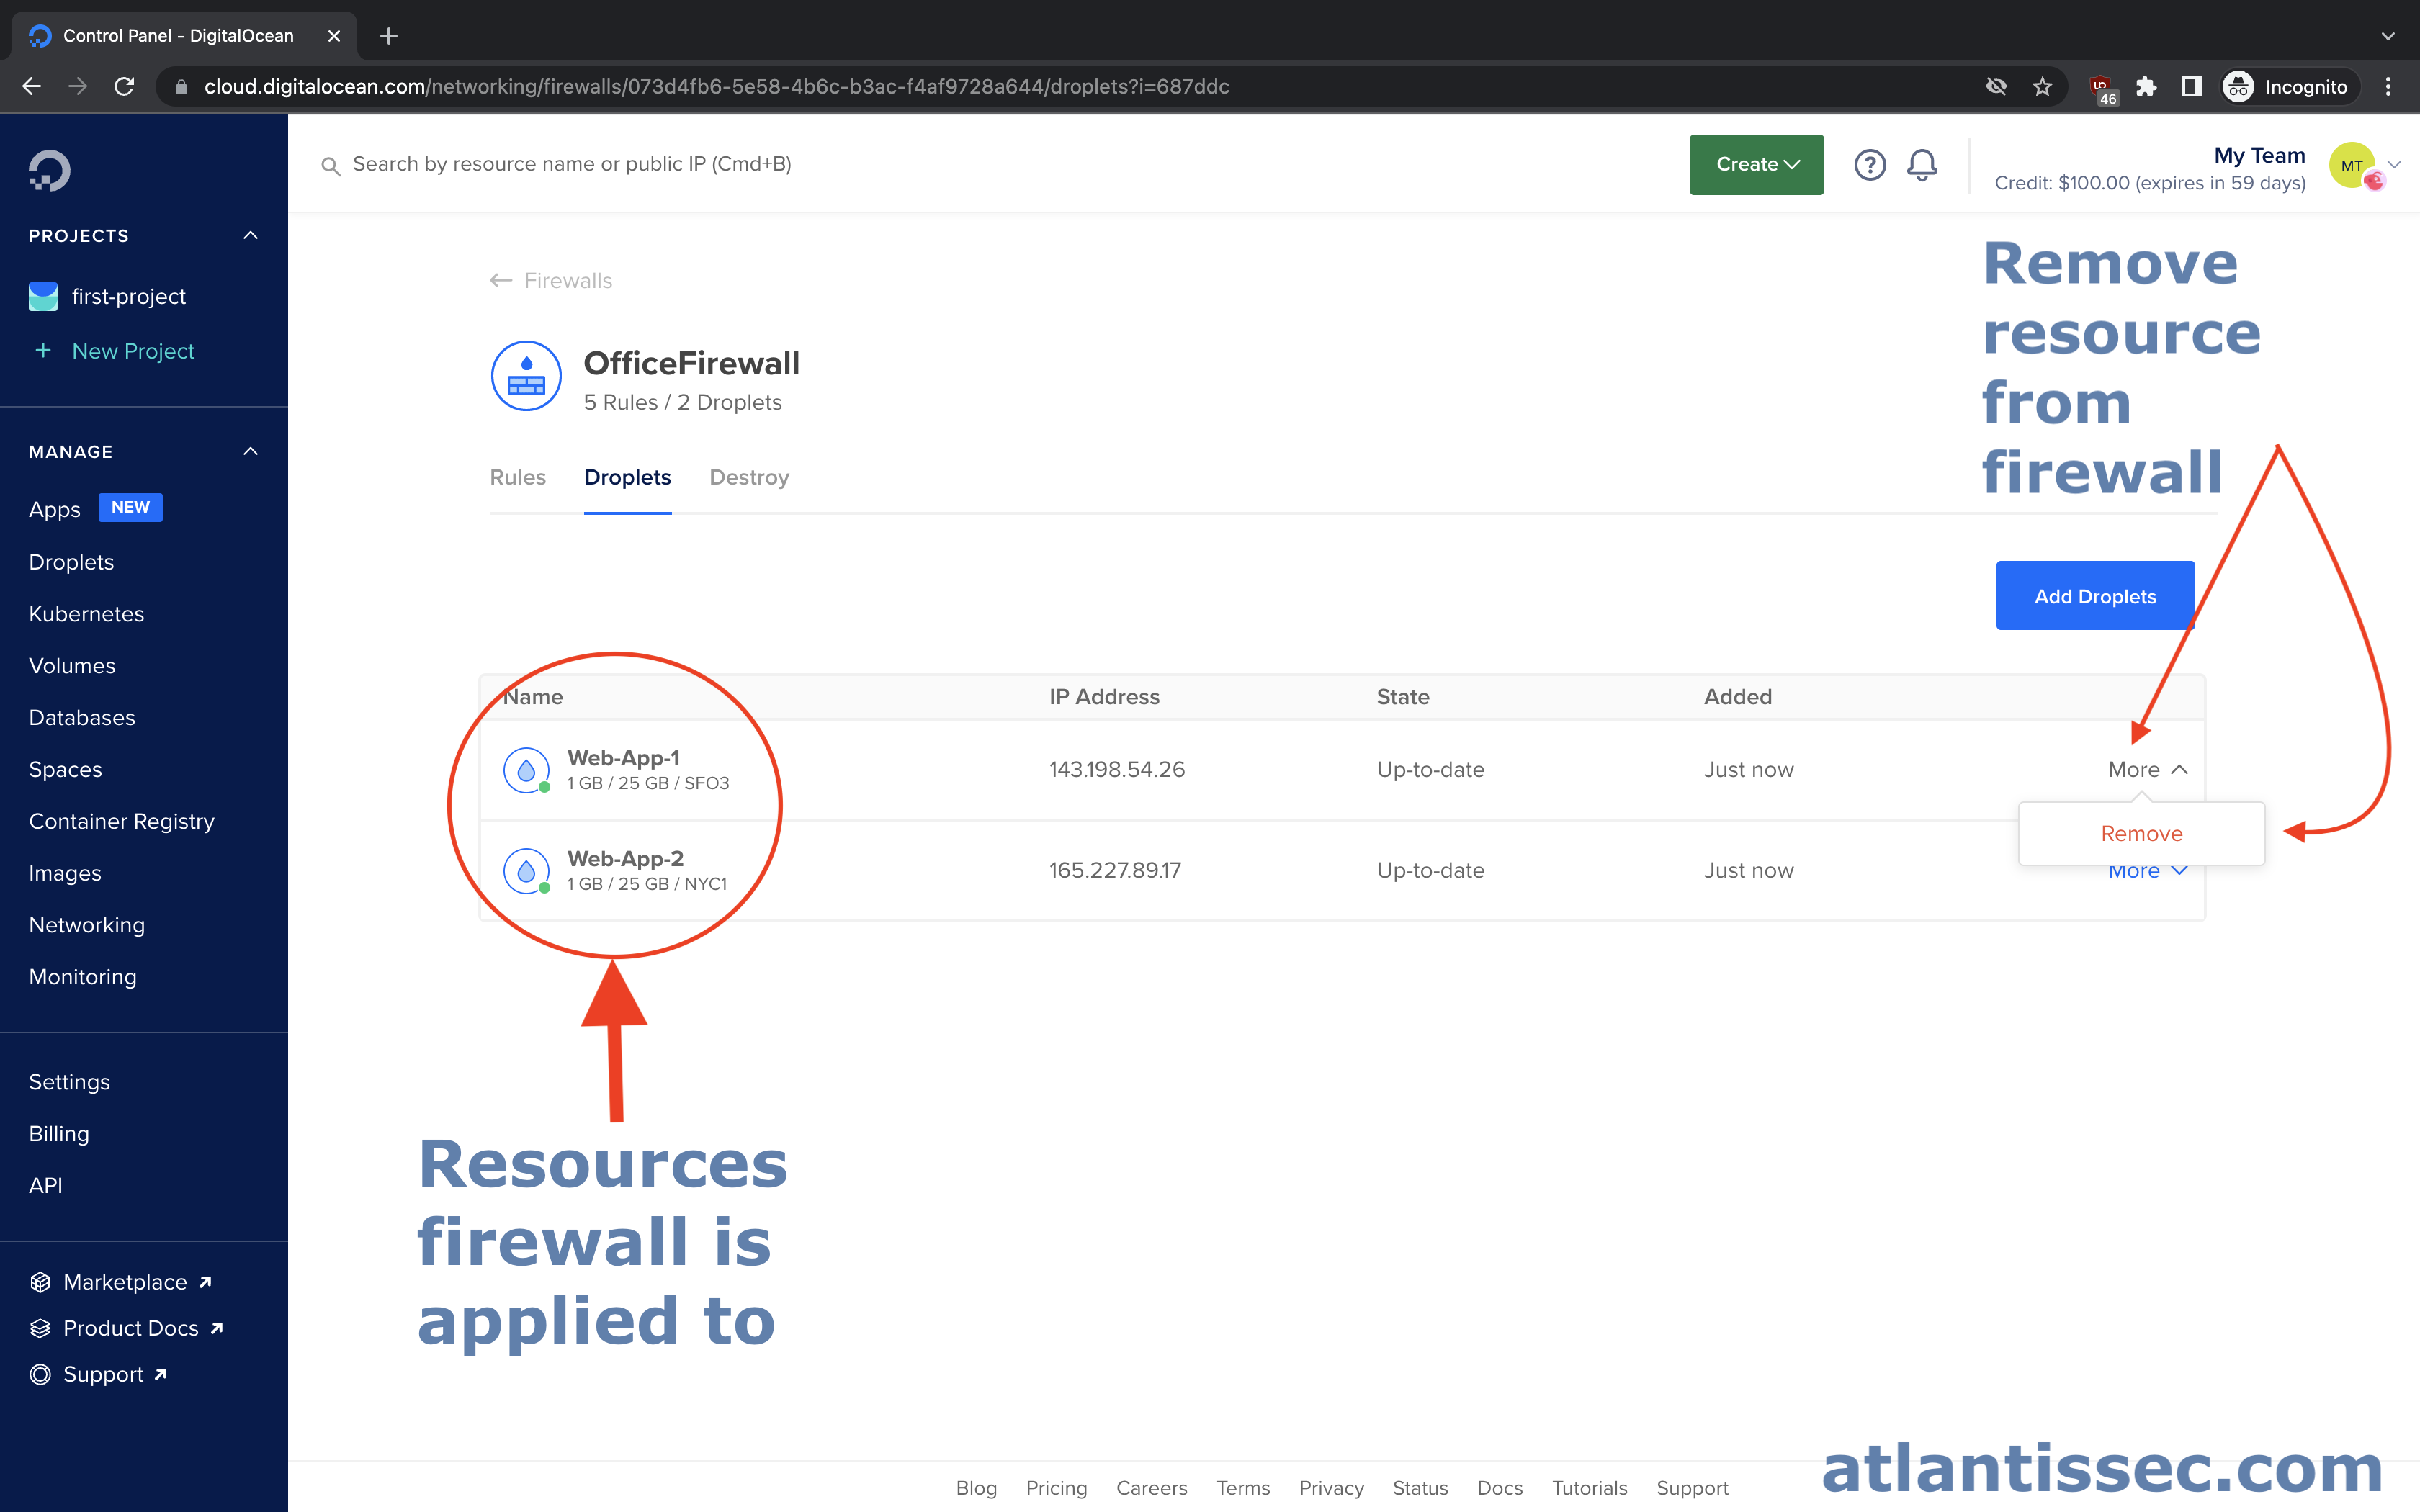
Navigate back to your firewall, see these steps if you need a refresher. Once you click on your firewall to open it up, navigate to the “Droplets” tab and then click the “Add Droplets” button
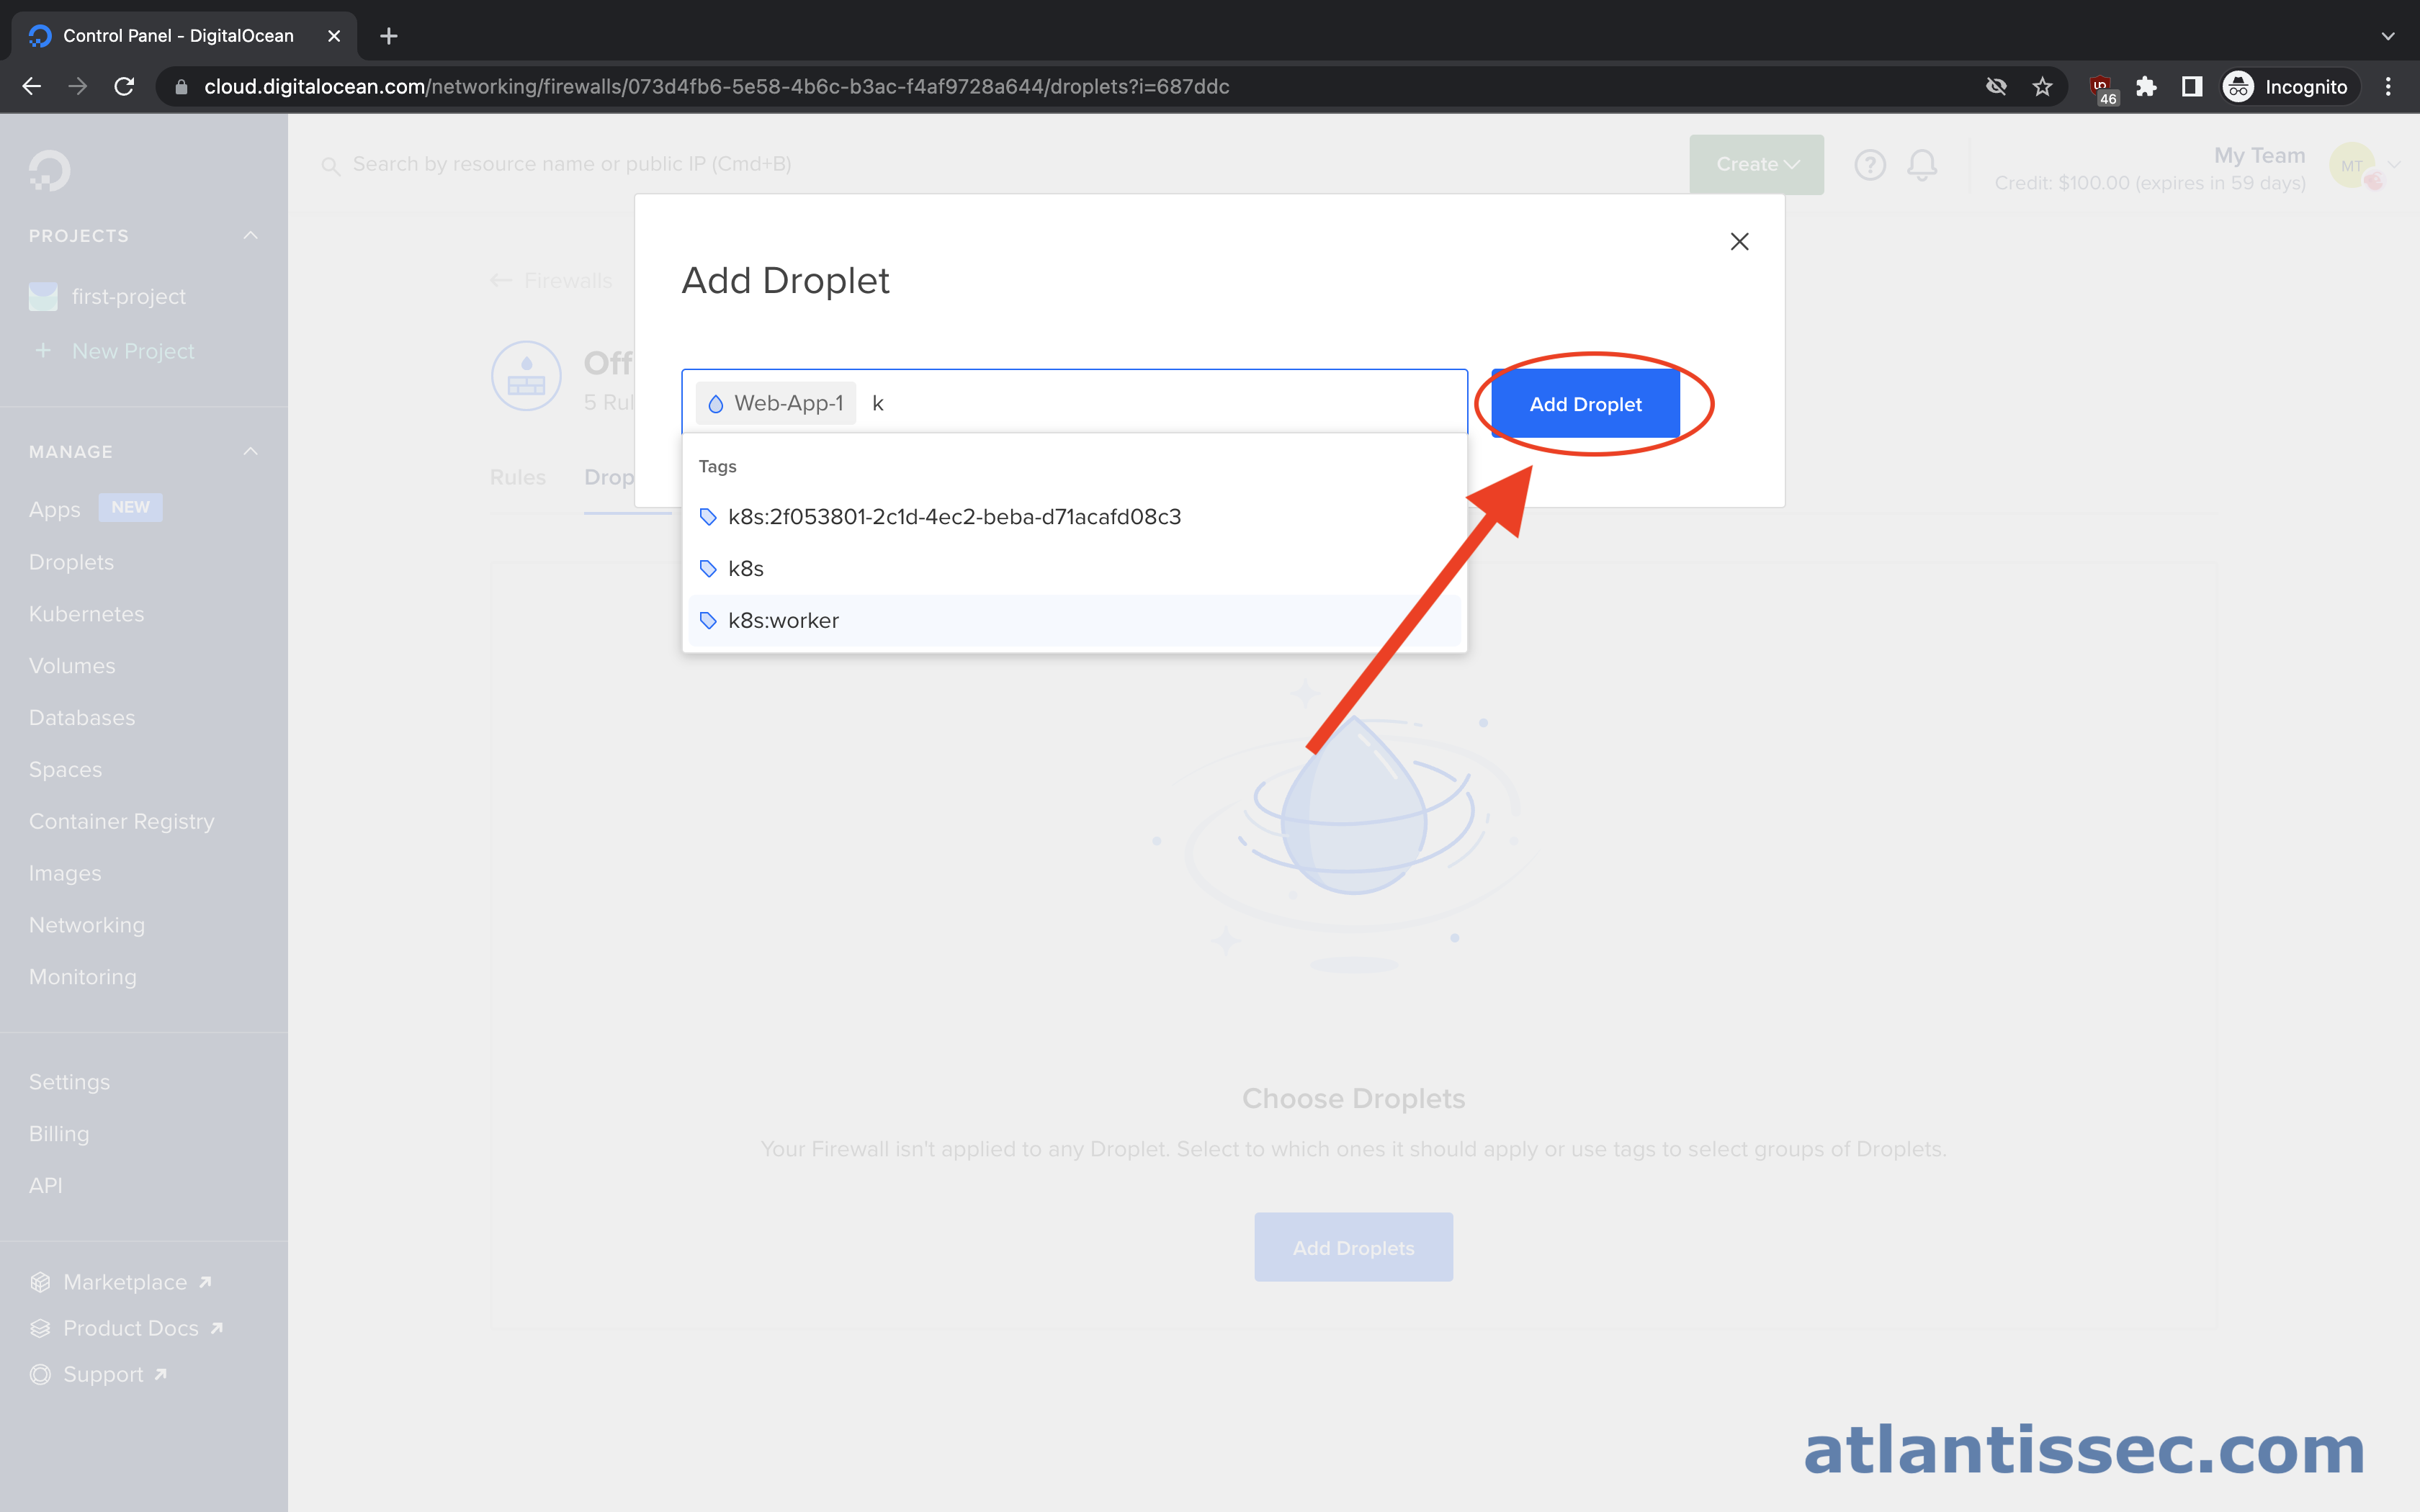
On this prompt, you can search for the resource you would like the firewall to protect. This can be a tag to cover multiple resources at once, a droplet, load balancer, etc. Once you are finished selecting all the resources you want, simply hit the “Add Droplet” button.
You should now be able to see all the resources that are protected by this firewall. From this same page, you can click “More” next to a resource to pull up the option to remove it if needed.
Whitelisting IPs for different scenarios
Securing SSH
One of the most common scenarios for IP whitelisting is securing SSH on your server. Let’s look at the below rule configuration for a basic SSH whitelist setup

Here you can see, that we removed the “All IPv4” and “All IPv6” sources from the SSH rule and instead added our IP of 138.199.2.1. Now, only connections being made from 138.199.2.1 will be allowed and all others denied to port 22. From this point, you would just add the DigitalOcean resources you want to the firewall for this to take effect.
Protecting a development or staging environment
Let’s imagine that you run a website called “example.com” but you also have a staging website hosted at “staging.example.com” where you test changes before they go live, yet you do not want anyone to see these changes except you. Let’s take a look below at how we can configure a firewall rule to restrict who can access this staging server.

Here you can see that we have configured an inbound rule on ports 80 and 443, HTTP and HTTPS respectively. We added only our IP 138.199.2.1 as a source, so any traffic not originating from this IP will be dropped. This will allow us to access our staging website without worrying about others seeing it. Of course, you can add other IPs or an IP range if you want to allow multiple team members or a whole office of employees to view the website. As always, after you create these rules, make sure you add the DigitalOcean resources to the firewall that you want if you haven’t already.
Restricting communication between two services
There are various scenarios where you may want to restrict communication between two services. For this example, let’s imagine that we have a Web App server (172.16.5.1) and a MySQL database server (172.16.5.9) on the same VPC and we would like to add an additional layer of security by configuring firewalls to whitelist their IPs so they can communicate with each other but not other services.
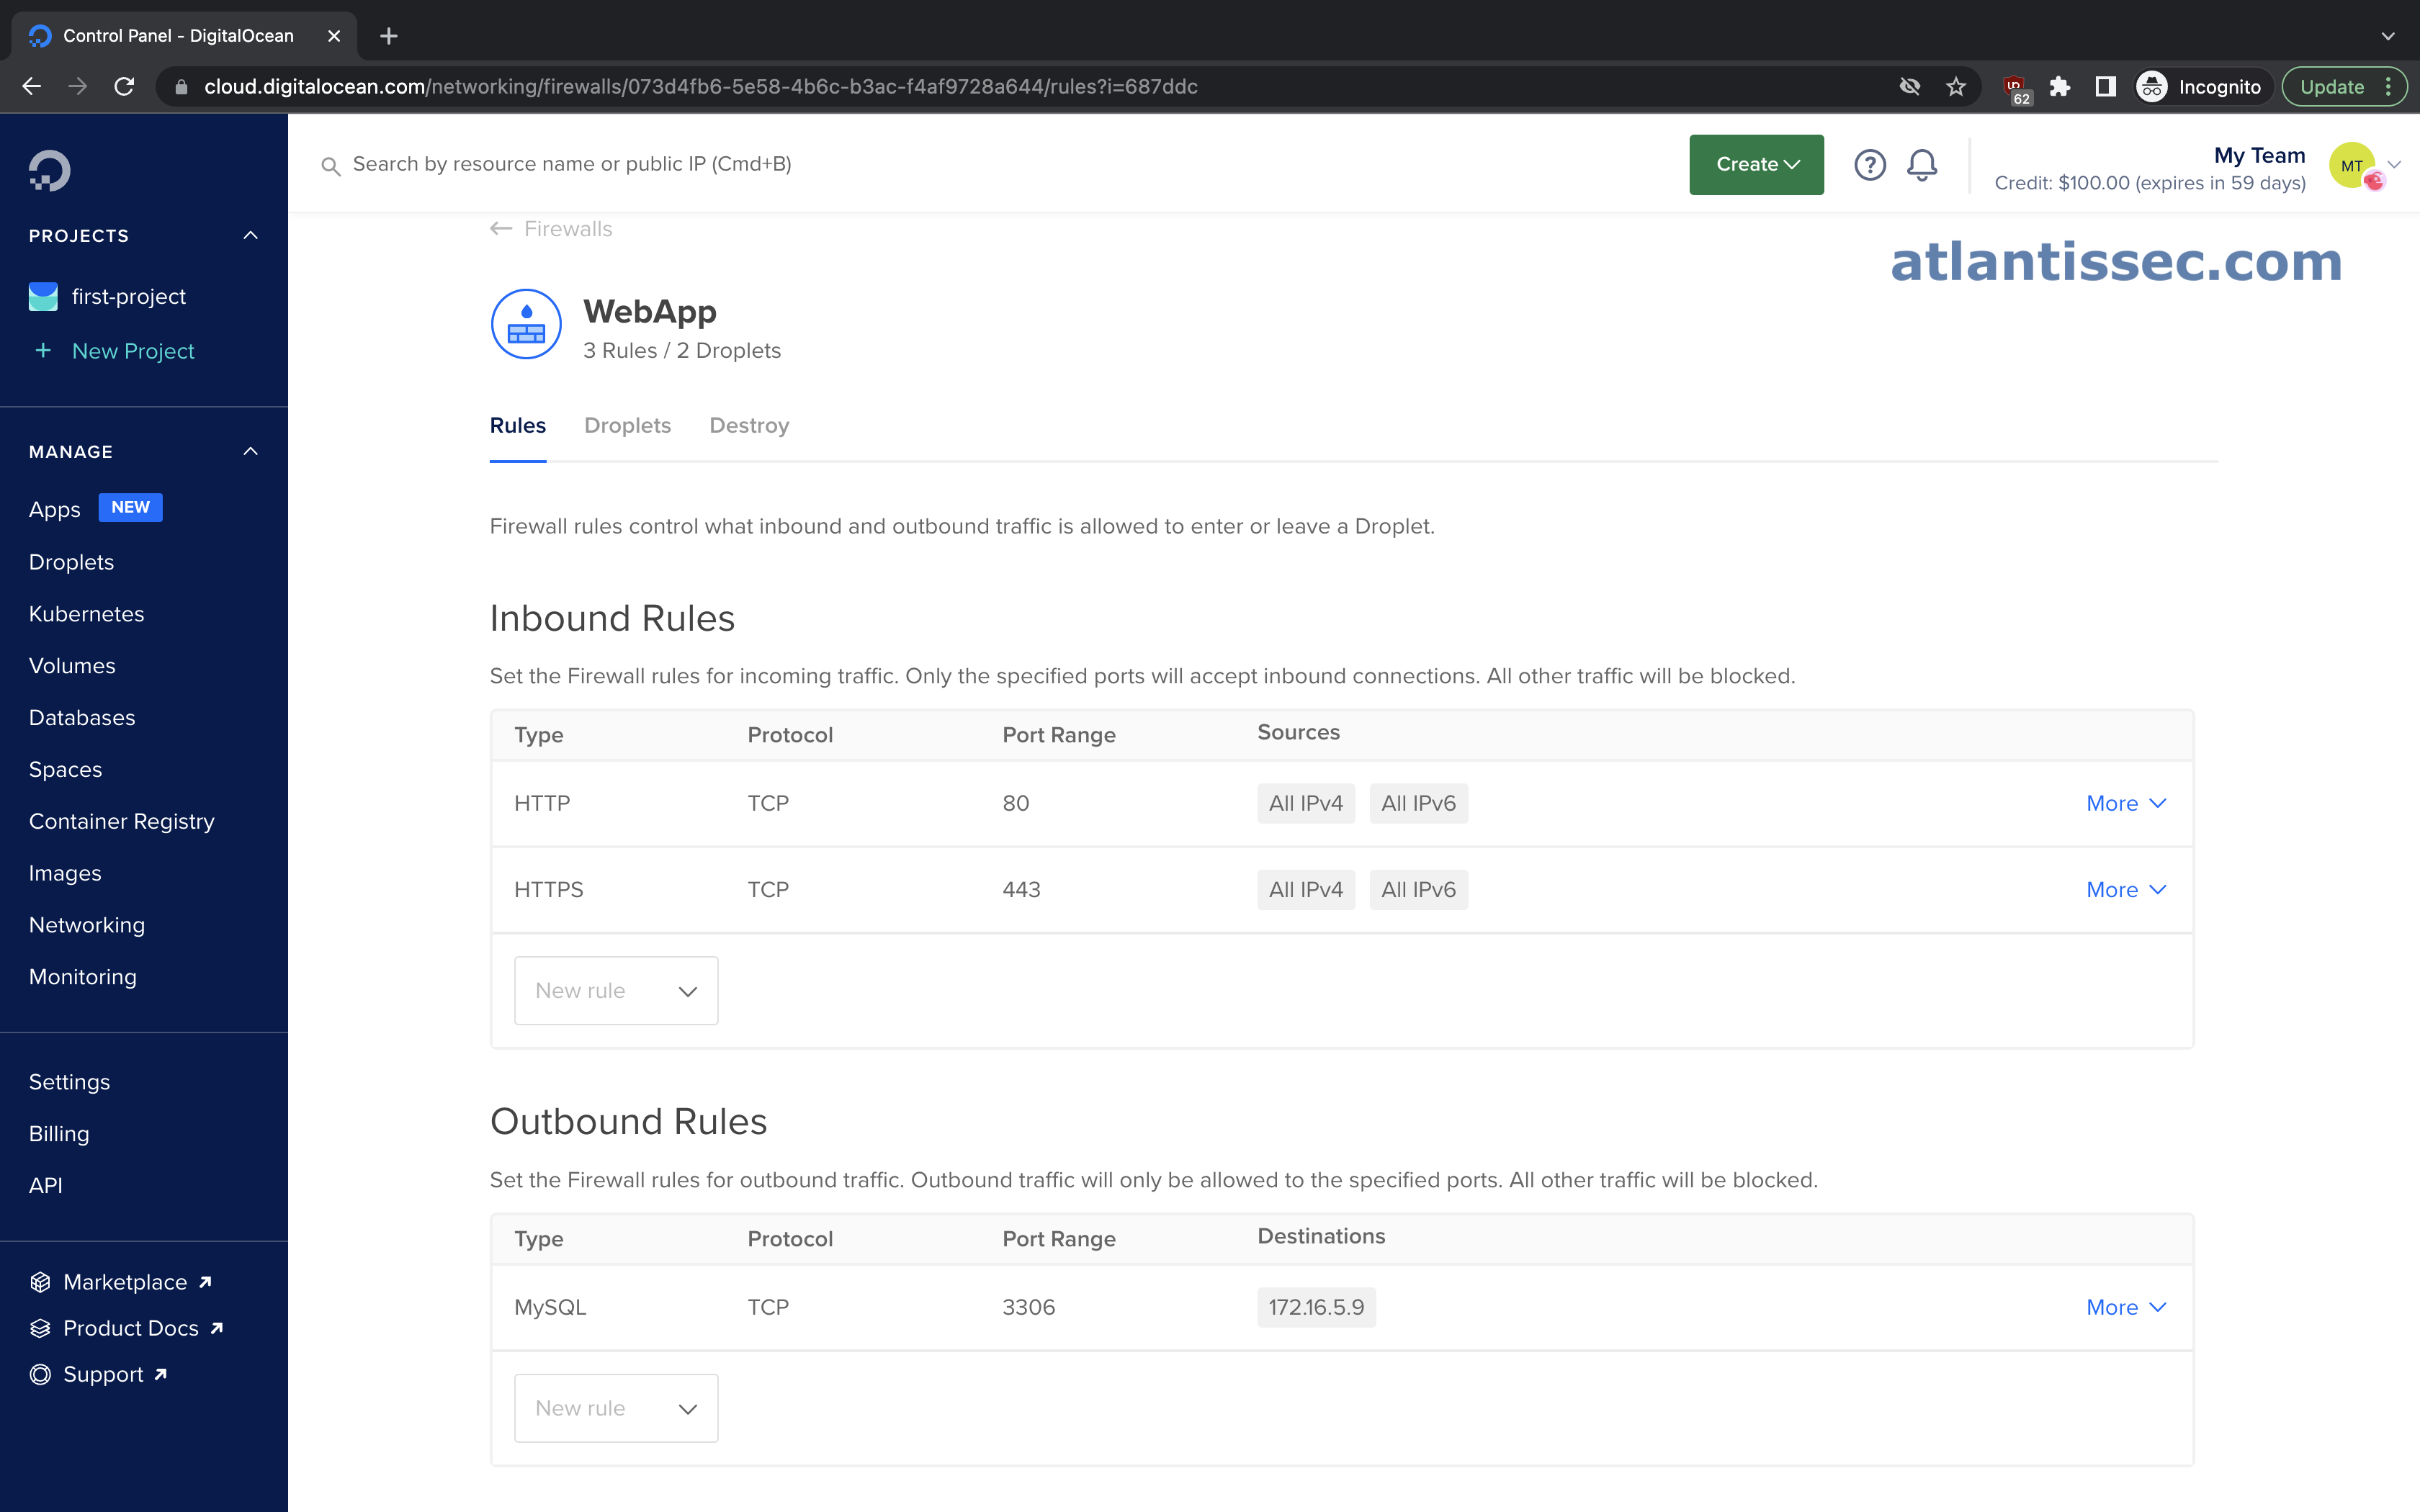
In the screenshot above we have a firewall for our Web App. This is configured to allow HTTP(S) traffic inbound so it can serve its content but it is only allowed to make outbound connections to the MySQL port (3306) and more specifically to a destination of 172.16.5.9 which is our Database server. Now let’s take a look at our Database’s firewall configuration below.
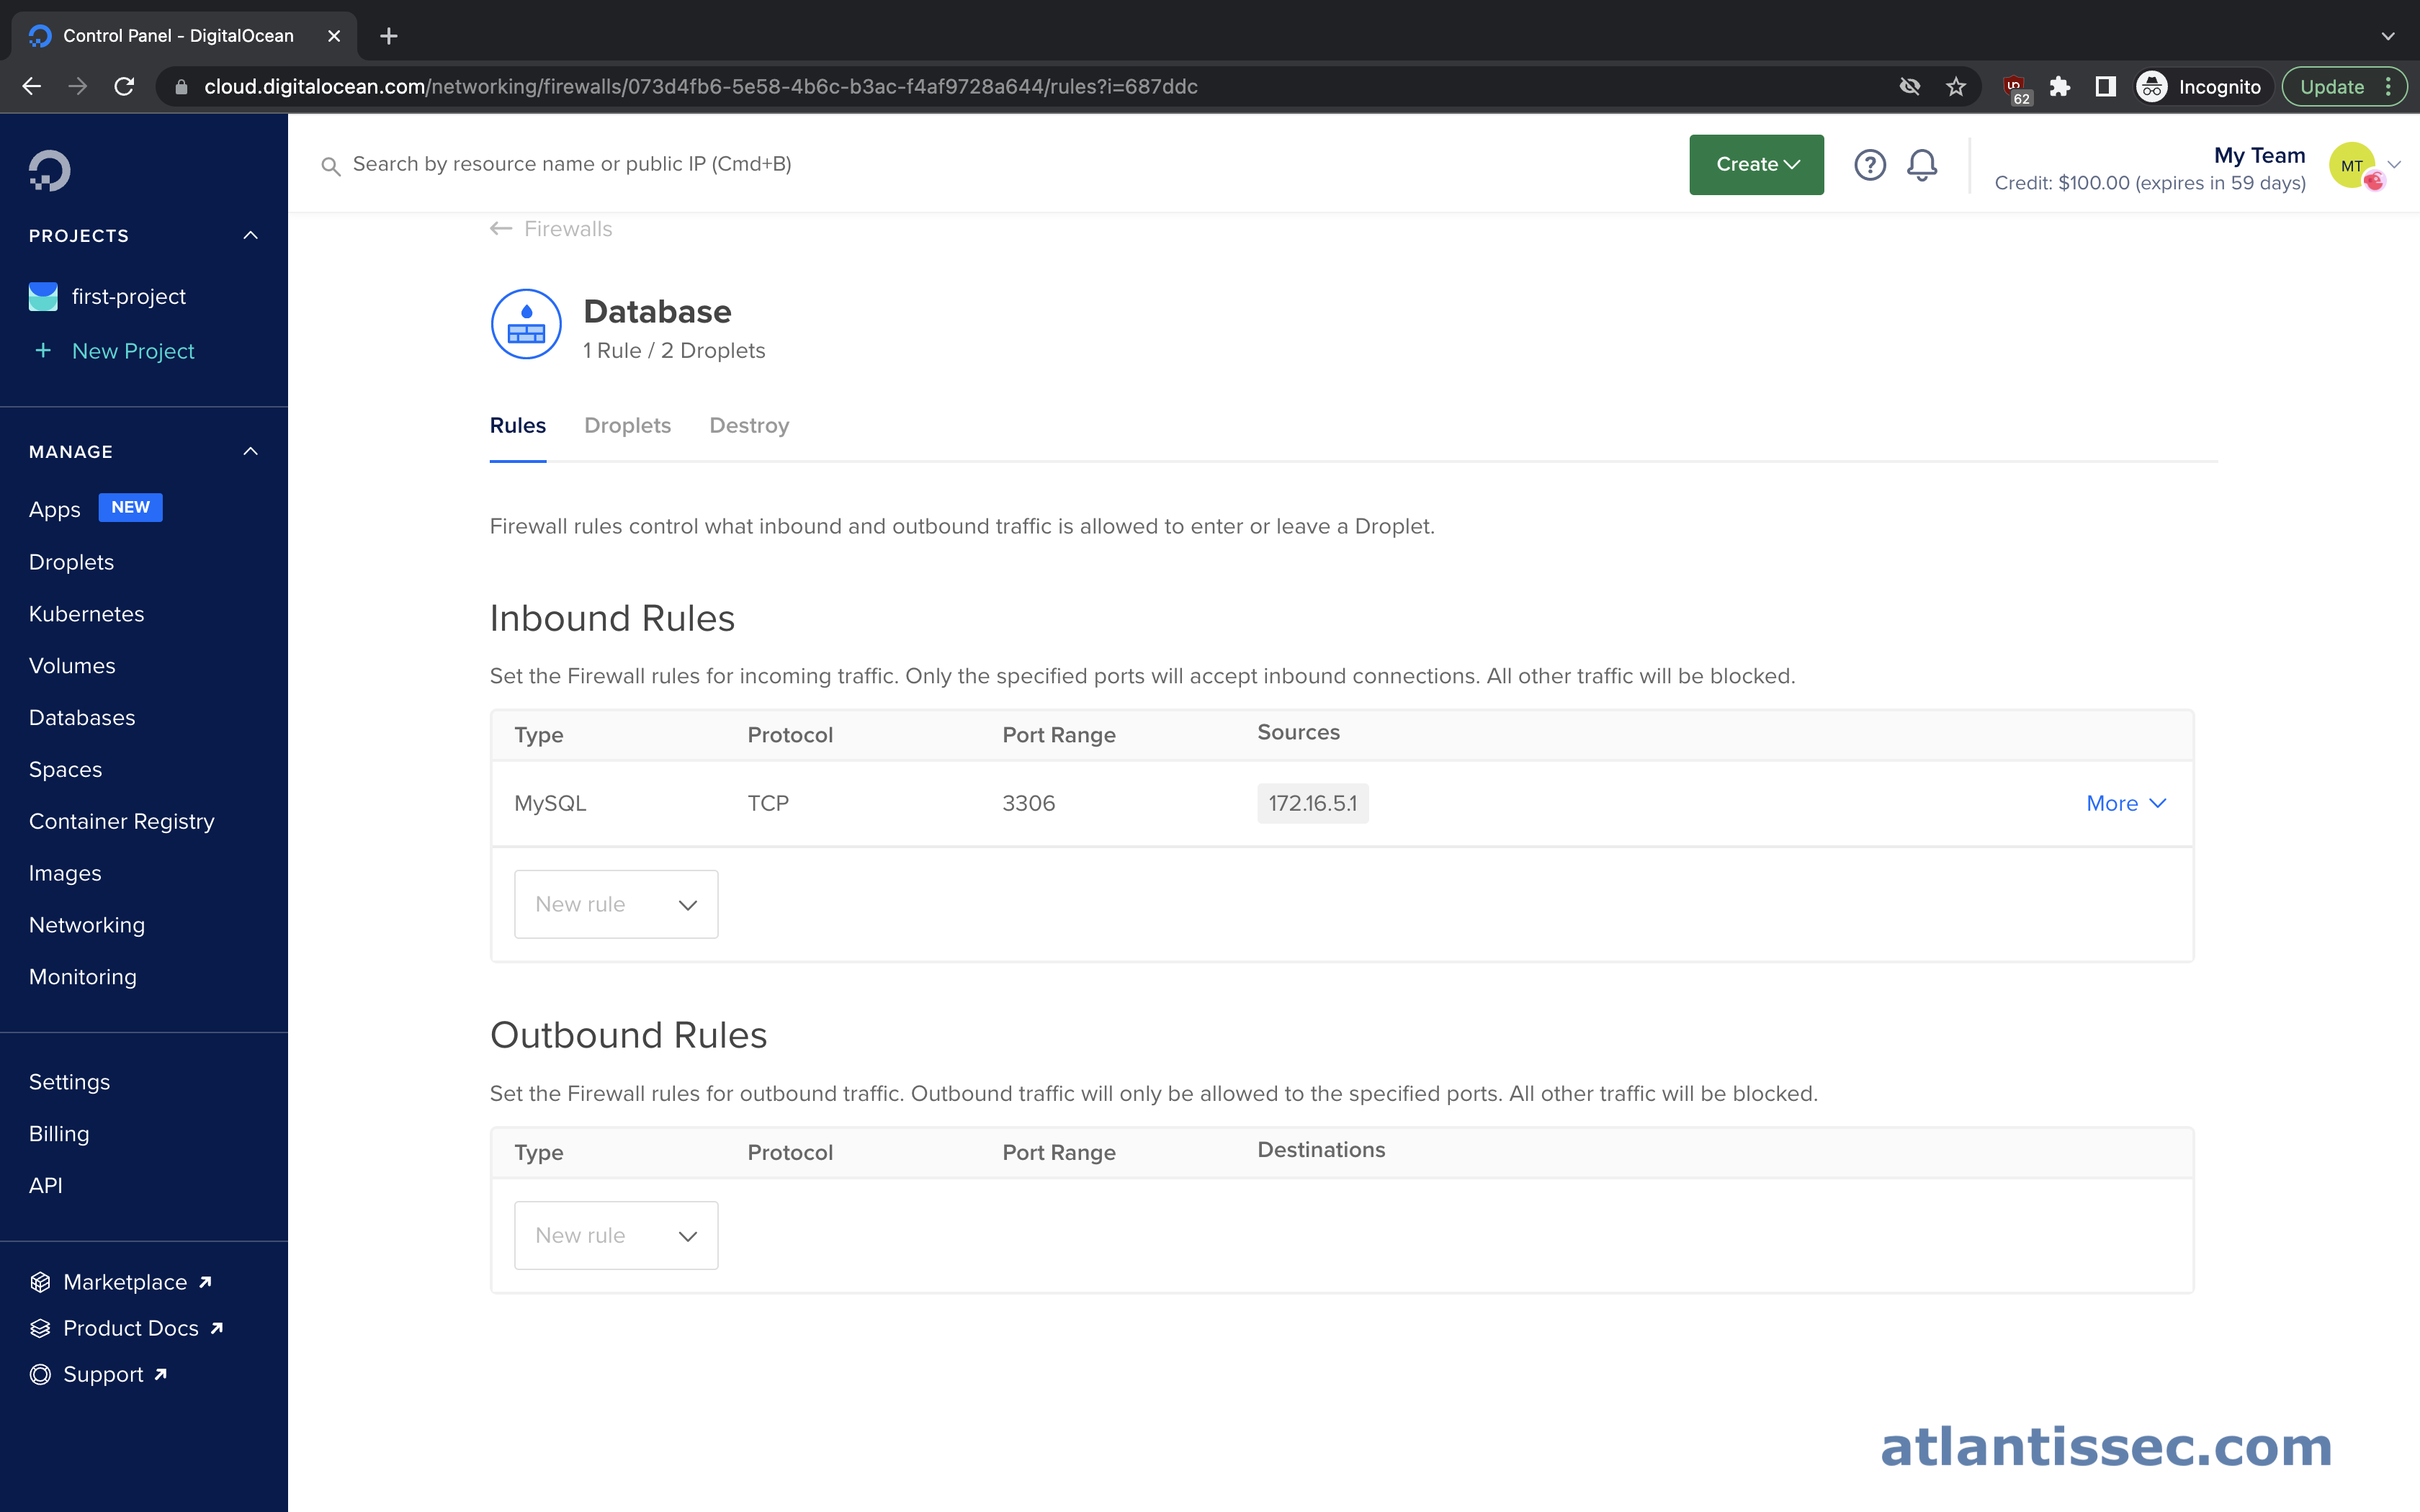
Here we have just the opposite, we allow inbound connections on port 3306 from a source of 172.16.5.1 which is our Web app server and we allow no outbound connections. This configuration restricts traffic to only what is necessary and to whom it’s necessary.
It is also worth noting that DigitalOcean gives you the ability to select a resource in your account for the source and destination of the firewall rules which can come in handy for readability versus just a private IP address.
Wrap Up
Hopefully, this article was useful and will lead you on your way to securing your environment! As always, please feel free to leave any feedback or questions below. Also, consider checking out our DigitalOcean security scanning tool Atlantis. It will scan your cloud environment for security misconfigurations, including firewall rules in your account, and suggest remediation steps.
thank you